Our Natural Light Assignment this week is a lot of fun and so easy to do. You only need a model or subject, a camera and lens, and a setting sun. And maybe a building or two… your call.
These shots were taken in downtown Phoenix at a fun group shoot we were doing at a place called “Boo’s Warehouse.” We had some motorcycles and old cars and such. It was a lot of fun and I wanted to do some very simple shots with the direct light and the soft shadow line light we were getting.
As the sun gets lower and lower on the horizon, it starts to throw a softer edge to the light. I like to use that edge as a great place to shoot.
One of the things you notice when using that edge light is how fast it moves. I mean, it can literally move up the person’s body as you watch it. And if you are on assignment, it can move even faster. Yeah… I’ve seen it. 😉
Before we take a look at that cool light, I want to remind everyone that we will be starting our monthly assignments in February. We have some great award premiums that I will be announcing as well as some great judges. The assignments will be professional in nature and should be within most shooters ability to produce. (Getting shots of a model hanging from a hangglider over the sea won’t be assigned… heh)
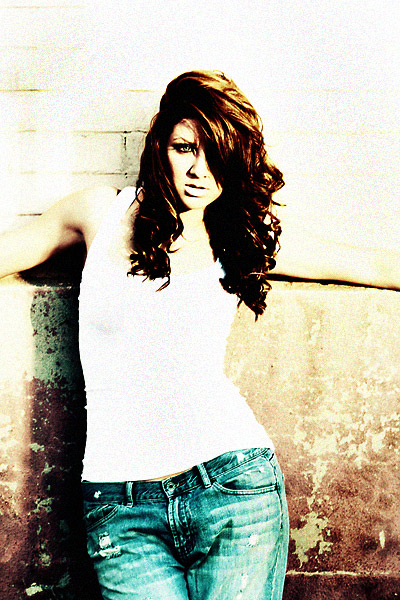
Here is the first shot we did as the sun was late in the day above the horizon, approximately 1 hour before sunset. There are no clouds in the sky.
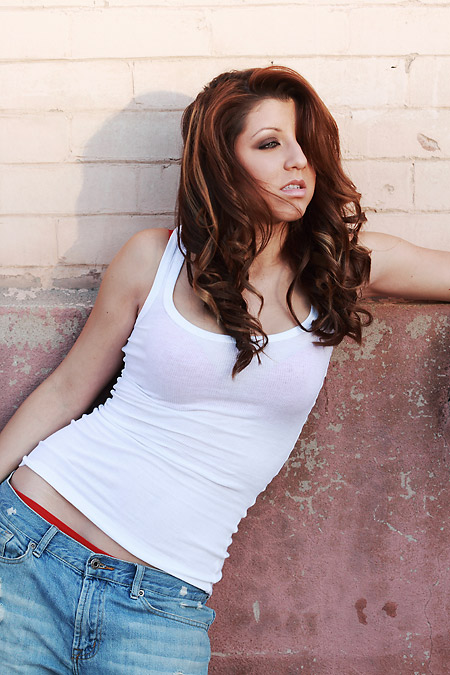
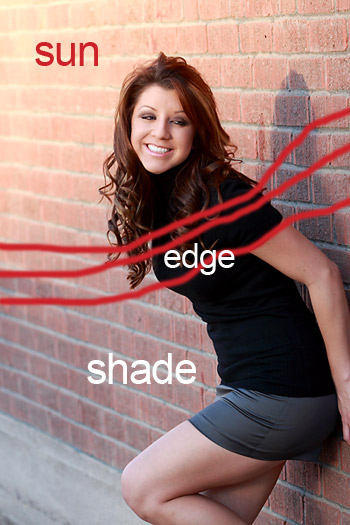
You can see the edge area and where I have placed her face just above it so there would be no shadow line over it
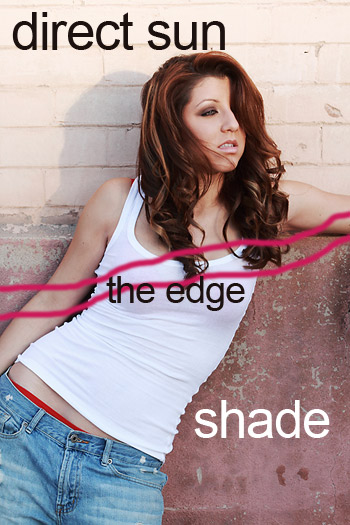
Below you can see how I segmented the light with the portrait. It is very important to watch the face as you do this kind of light. It can be shadowed or even end up with a gradient on it if you aren’t very precise in placing the face.
There are a lot of different effects you can use when shooting in this direct light. I took this image through some rather extreme Photoshop contusions (coming up in a future post) to end up with this illustrative look. Adding a very slight noise at the end helps add a little patina to the image.
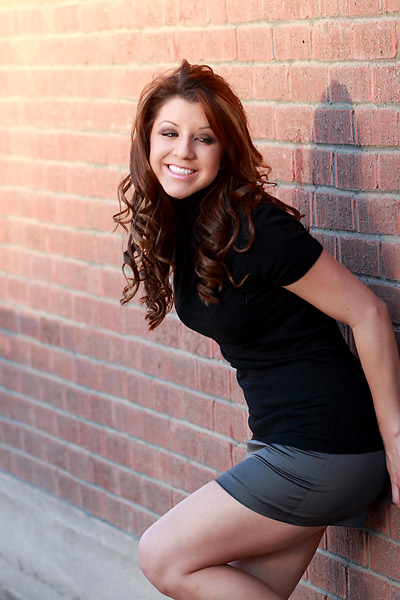
After a quick wardrobe change – and I mean quick, Briana knows how the light is – we tried a few more shots. The sun was much farther down the horizon now and closing in on dark fast. The first shot is one
You can see the edge of the light as it modulates up the side of the wall. This edge not only gives a nice light, it gives a very nice background/foreground look as well. Once again I repeat that this edge moves very fast. Within 5 minutes we had chased the light for nearly half a block as the buildings behind us kept throwing shadows from the ever setting sun.
Here is a look at the placement of the shadow line.
I had Bri go on down the wall a bit to get some good light on her face. I wanted the skirt in the shade and her face in the light. I put her face right in the edge again and slightly toward the sun side. This gave me a very soft, yet directional light.
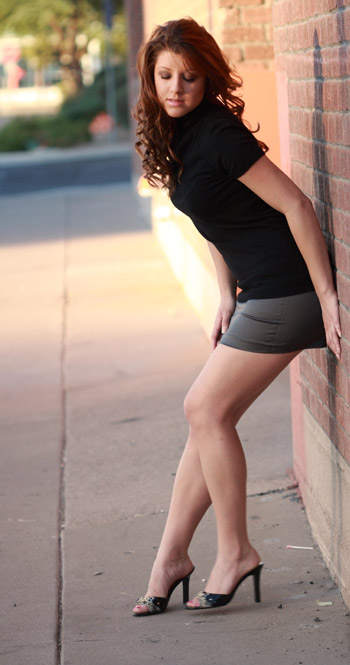
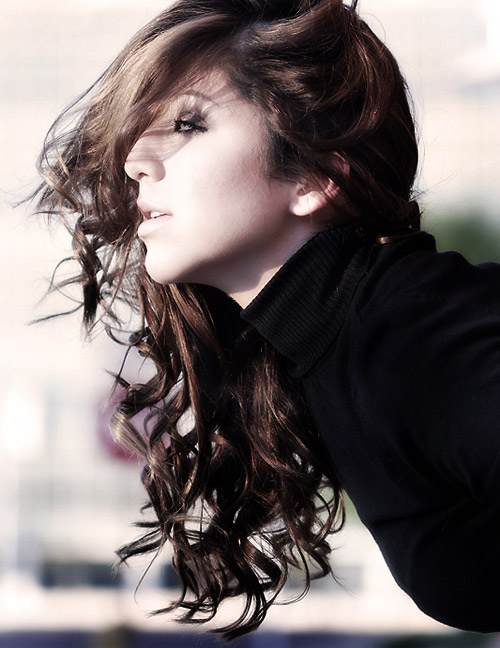
Notice the light as a background element in this shot. Working Bri in the edge, I got very soft directional light.
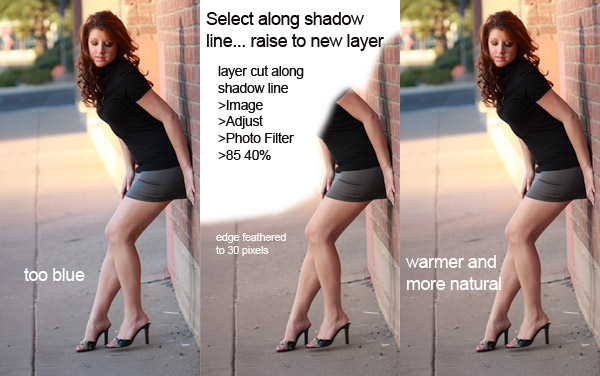
However, this image resulted in some cooler light in the shade, and warmer in the sun. I processed the image direct from RAW and worked with the image in Photoshop. I made the normal correction and edits to the image and then worked on the color.
Drawing a selection of the shaded part of the image, I feathered the selection at 30 pixels and raised the selection to a new layer. The easiest way to warm the selection was to use the photo filters.
Image / Adjust / Photo Filters / 85 Warm 40%
That warmed up the shade part to a more acceptable color.
Right at that point I saw how dramatic her face was lit in that soft, directional light. I had her throw all of her hair to the side away from the camera and look right at the sun. I was able to get about a dozen shots off before we really did lose the light. I am so glad that I saw this happening as it ended up being one of my favorite shots of the day.
I used a Canon and 100MM 2.8 lens for most of these images. I also use the lenses wide open whenever I can, preferring a limited DOF.
Try working a subject in that very soft edge of the setting sun. You can get some very striking photographs with a minimum of equipment.

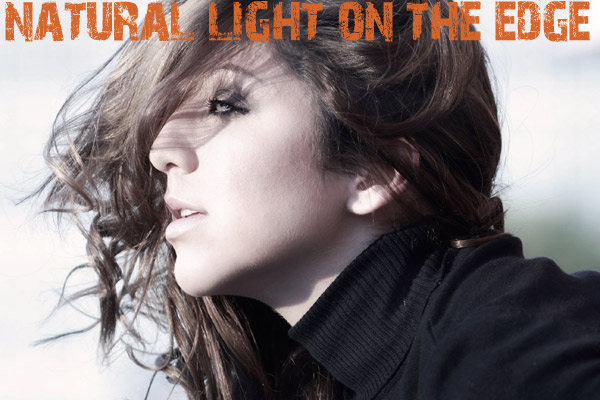



I happen to love those three words…minimum of equipment! I really like the results of using natural light here. A very inspiring set of pictures.
Yes, I need to get out and shoot natural light again, I have been woking to understand the lighting so much. its good to get back to basics and not orget what the natural light can give us. Besides, hauling all the lighting gear gets OLD !
This is great advice for the wedding photographer, or those who need to travel extremely light. I’ve noticed a bit of a trend reverting back to available light in recent posts across the net – nice to see a balance from all the strobist goodness.
Love all of the information here. I reallly enjoy working in natural light and you have just broadened my understanding a bit.