This post is about portrait lighting and some of the things I think about when shooting a portrait… whether in the studio or on location.
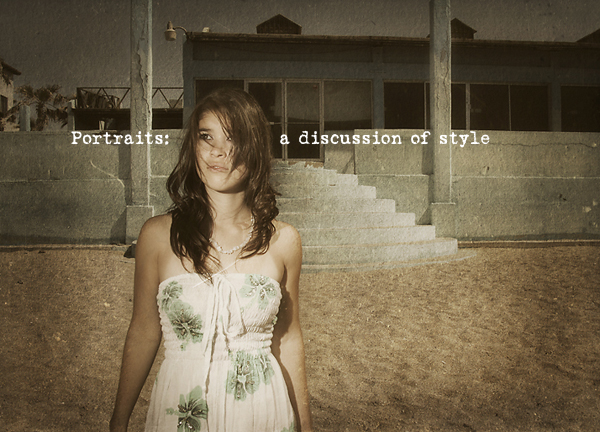
The shot above was done in Mexico at the Workshop in April. Christine had been walking with me and when she turned to talk to me I saw this shot. I pre-visualized the image as being somewhat illustrative… some heavy Photoshop was planned and I wanted the colors to be muted. The feeling was one of mystery, and the color palette and post would show a portrait that was modern, but also seemingly candid.
I liked the symmetry of the background, but also knew that putting her there would rob the image of the candid aspects. I wanted her to be moving into the middle of the poles… not be there already.
The sun was over my right shoulder and when she looked away toward the beach, her face was in shadow. I wanted to light her independently from the background and knew that a split lighting would work to show off the shot.
A handheld 430EX on a tethered cable was aimed right at her face… on the axis of her nose. I wanted no nose shadow or face sculpting at all. (Secretly I wished I had a beauty dish at the time, but – well, I didn’t.) I had Christine look over toward the water – and the light – and carefully framed the shot. She did a great job of posing and looking like she was distracted and NOT being the subject of a photo. I loved the hair coming into the face and we did a dozen or so exposures. The light on her coming from camera left while the backgorund is presented in light that is camera right adds a bit of whimsy or mystery to the shot. Christine’s excellent acting for the camera cinched the look I wanted.
Later in Photoshop I made the shot into what I had seen by adding some texture, muting the colors and presenting it within a very slight vignette.
Before we go ahead, I want to remind everyone that there is a ton of information on this site. Hit the archives button and grab a cold one. You can spend a lot of time here. And please tell your friends about us, we want a ton of people to learn to light and have fun with photography, but most of all we want to help photographers reach their goals. We offer this site as well as workshops all over the country.
See these recent posts for some more cool reading.
Claire Curran Corbett Interview
Eduardo Francis Interview
Our WordPress Themes for Photographers
Now lets look at a few more portraits and discuss the making of them, shall we.
Please remember to visit our sponsors. Links are on the sidebar, and they have some great offers for you.
Soft Window Light (Somer in the Shower)
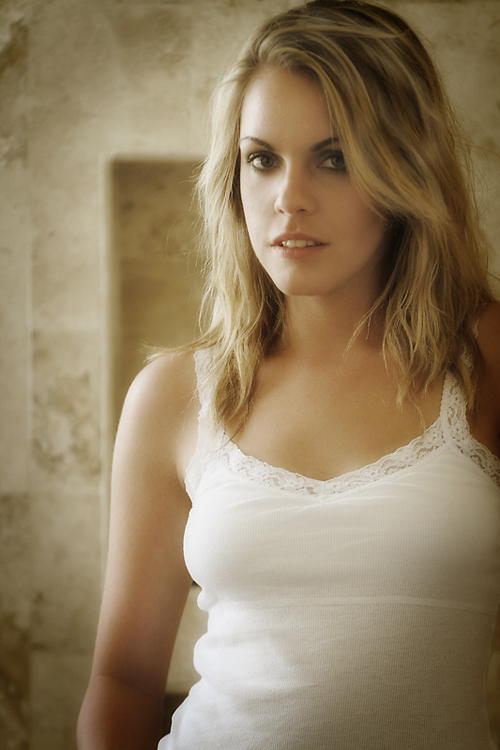
This photograph came about as a test. We were looking around for a place to do some soft headshots and I remembered the great light that was in the shower in the master of the casita. Somer went in and I went on the other side of the room to use a long lens. I remember thinking that the light was so warm in there due to the brown tiles, that it made her skin tone lovely.
The soft directional light gives the face shape and shows off her beautiful eyes. Using a long lens with this kind of light also brings a flatness to the features from the shortening effect of the telephoto. That shortening effect, added to the very shallow DOF of the aperture (2.8) helps to sculpt the subject from the background.
I used no fill cards or strobes for this shot, preferring to let the light do its thing. I turned her head slightly toward the light to get a full half face lit. I don’t like the light to be ‘patchy’ on the shadow side of the face. The pose, soft and natural light, and DOF combine to make a lovely, understated portrait.
Jesika on the Yellow Sofa in Dallas
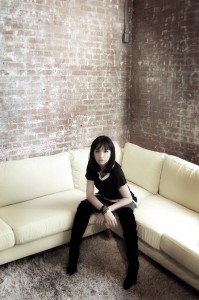
This shot is from the workshop in Dallas. We were taking a bit of a break when I noticed Jesika sitting in the light in the corner. The window light is coming from over her left shoulder (camera right) and was creating a wonderfully soft shadow on the couch. It was a very large window and had a wonderful soft feel to the light coming in. I needed to add a little light from the front to open the shadows and gain some texture in her wardrobe.
Bringing the medium octabox in, I set the light by making it slightly less than the sunlight. Taking the light reading with a meter and then metering the strobed Octabox to about 2/3 less exposure. I then exposed for the face, and let the back light go 2/3 over. The point was to make the light seem as though it was coming from the window, but also that she was the subject and she was lit a bit oddly to bring her out of the background. The eye knows when something is added, even subconsciously. Looking into the shadow area at her feet you will see the shadow created by the strobe and octabox. This is because this area was in total shadow, not getting any sunlight from the window. There is no shadow on the lit area behind her because the octa is less light than the window, but there is at her feet because it is more light than what was there.
I wanted a feeling of isolation and vulnerability, so I chose the wide angle lens and placed Jesika at the bottom of the image. The formidable brick wall rising above her, added with the symmetry of the couch and angles, gave her frame a ‘place’ against the ground. Her pose and the angle of her back and legs break the symmetry, and her face adds to the feeling of vulnerability.
The light, while seemingly natural, adds to the drama by keeping the figure so well ‘placed’ within the background and the set.
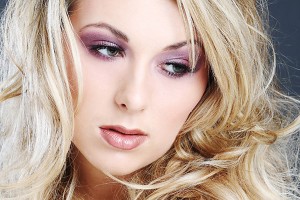
I used a large (60″) soft-white umbella in very close for this shot. I needed the light to be soft and even to show off her delicate features and Lorri’s great makeup work. Adding a large white fill below her at chest height filled in any shadows and opened her eyes beautifully.
The first shots were fine, but there was something missing… a sense of mystery or ‘interestingness’… So I added a speedlight in close for a hair light, letting the hair get quite lit from an off stage source. Bringing a fill card in at an angle to catch some of the direct hairlight gave me a bright poppy hairlight to camera right as well. This little bit of lighting made the image more interesting and drives the viewer to her eyes.
The pose was the last little bit of work I did. I wanted to make a statement other than “look at me I’m pretty”… I wanted drama. Having her avert her eyes was a simple way to pull the image from the “seen before” to the “interesting.” As she worked this pose she would slightly tilt her face… I wanted her to actually do the tilting and look away from me so there would be some reality to the image. Catching it was my job. We did it until I thought we had it right.
Adding the backlight to the soft front light gave the glancing away a little context… a little drama.
Edyta with a very “direct” pose.
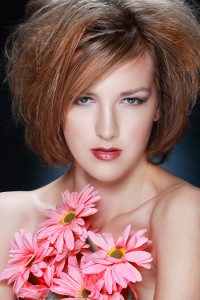
Sometimes a very direct look can be dramatic as well. Edyta was piercing me with those eyes and I needed something to offset the hardness of the portrait. Although I liked the hard, symmetrical look to it, I wanted to beak the image up with some angles and whimsy.
She was wearing a tube-top and with the bare shoulders and well toned muscles she looked too strong to me. I wanted the light to add to the strength, but not to make her look over the top, so I worked it a bit more. The main light was brought in quite close and again it is my 60″ umbrella. A shiny fill board was added for bottom fill and it is just out of sight of the camera. This light gave her a well lit face as well as some beautiful liquidy highlights on the shoulders and muscles in the chest.
A few shots told me that it was still too “flat” so I needed to add some dimension. I did that with a small reflector against the back wall (10 feet behind her) and positioning it to give me a small circle of light behind her shoulders and neck. The closer the light gets to the back, the tighter the ring of light becomes. Working that light to the correct amount of power can be a bit daunting, but a few sheets of spun glass from the local video house can dampen the strong light and give a little softness to the edges.
Doing this gave me some depth, and the addition of a speedlight in close on the top of her head gave me just a bit of hairlight and another reason to drive the eyes back to the face. Big strobes with speedlights are a great combination… I love it.
The angularity and the directness achieved with the lighting, I now turned my attention to the pose. I wanted something else other than the bare shoulders. We added the flowers and it immediately worked for me. The hard, direct look of Edyta is offset by the seemingly random shapes of the flowers. They add whimsy where symmetry prevailed.
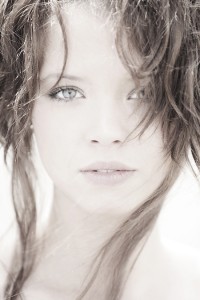
The last shot is of Laura and it is taken in the shade with a small fill card in close. I wanted something to catch the youthfulness and grace of a lovely young lady. Choosing natural light was instant… the long lens gave me a tight crop and I added a small card to the shadow side of her face to even out the exposure across her face.
I had taken her hair (after she messily put it ‘up’ on top of her head) and pulled some strands out to let them frame her face. I love that look and it adds to the natural effect of the shot. Pull out fewer than you need, you can always get more…pulling out too many and you gotta start over. They were kind of blowing and moving around her face in the very faint breeze.
I moved her forward to catch the edge of the sun on her head, but not far enough forward to cause a ‘backlight’ look to it. I wanted the sun to catch little strands of hair and add contrast to the shot.
The very flat light across her face, and the tiny bits of sunlight catching her hair, give the shot a natural, almost candid look. Choosing the long lens and bringing it in tight also added to the vulnerability of the image and her beauty put right in front of our faces to view. I have a 20×30 of this shot in the studio and it really is striking. The combination of a natural look with a tight crop makes it irresistible.
I hope you enjoyed this post on portraits with some of my favorite portraits of the recent few months. Lighting Essentials is growing and I hope to take it to some new places in the coming weeks. Stay tuned.
See you next time.



Great post – and lovely shots – can\’t wait for the UK tour!
I love the posts like these, Don – more about the “why” of the light than the “how”. I always learn a new way of looking at a shot 🙂
keep ’em coming! more more more!
Love the blonde model portrait. Interesting that it was done with an umbrella because I usually do these shots with a beauty dish. An umbrella is much more portable of course and easier to bring along, especially for wedding photography portraits of the bride.
Wonderful post on your technique- was definitely good reading. 🙂
Nice post, I enjoyed how you set these shots up. It would make it even better for my if you threw in a lighting diagram for some of the more complicated ones…just a thought, I understand the work involved.
Thanks
Fun to hear you talk through that lighting. The strobe/speedlight combo is interesting as well.
a great article enhanced with a stunning portrait shot. Love the double captcha!
As a past professional and a current digital want to be professional, I am constantly looking for interesting educational sites. I am amazed at the number of high quality sites that are out there in Web-Land. I just discovered your site and must admit that I think it is the best site on lighting that I have seen thus far. Those of us who have been doing photography for some time know that lighting is one of, if not, the key component to great photography. Please keep up the good work continuing provide quality Lighting Information.
Great post on your style and technique. very interesting reading