Well, my Volleyball client needed a new ad. That’s great. We needed it to be concepted, shot, and produced in one day. A day that had me doing other things as well. Stressful? A little, but I have been at this game long enough to know that it will get done. It always does.
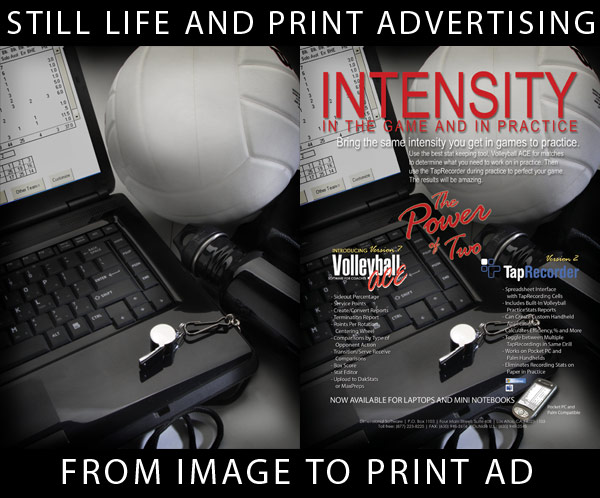
Concept was easy. The software they design for Volleyball coaches currently runs on Palms and handheld devices. A lot of coaches are wanting it to run on a laptop as they are starting to carry laptops to the games for other things and it would be nice to only have one device courtside. Announcing the availability of a PC based software for laptops is the overall message of the ad. It wasn’t meant to overshadow the total message of the two available software packages, but to let those who are currently using the older software that a new tool was now ready.
We always strive to be a little different. Most of the ads that are in the trades are either big time products like Adidas and Nike or small, mom and pop solutions for a niche of court volleyball. I want my ads to look as good as they can and also stand out. Shots of volleyball players taken under less than ideal lighting abounds. We have been going for the still life approach since we started working together in 2002. The ads stand out. They get noticed and the client gets inquiries and sales. Score!
This ad will be running in several trades, but the first deadline was “Volleyball Magazine” for the August edition, I believe. Court Volleyball closely follows the school schedules. The printing is pretty good in that magazine so I can push the gamma a little.
Before we dissect the shot, I want to remind you all of the Missoula, El Paso and Memphis workshops. We still have a few openings and it would be nice to have you there. We are doing a special 1 day intensive workshop on the NIKON CLS system with John Groseclose in August. It will involve studio and location work with single and multiple Nikon strobes. Both manual and iTTL will be covered. Look for more information soon.
Here are a few related articles you may enjoy after reading this post:
Adding some Texture to an image.
Another shot with post production for the same client.
Finding the right mix for blending ambient and strobe.
Shooting Food on Location
Thanks for visiting and tell your friends about the site. And now for the soup-to-nuts shoot of this ad.
Gathering the Props.
After the client and I spoke about the shot, I designed a quick sketch and then headed out the door to get the props. First stop was Home Depot for a pair of shelves to use as a background. They were out of the size I needed (?) so I decided to use the pair I had at the studio. They were in pretty good shape, and I could fix any small problems in post. I needed only a small amount of surface for the foreground, so finding a clean spot should be OK.
Then off to Sports Authority for the Volleyball props. Very important to make sure that they are for court volleyball, not sand or beach volleyball. Different ball, different accessories. And very important for the client’s message. The software is for court volleyball and it is targeted to court volleyball coaches that would see the problems instantly.
I have done a few shots for these guys before and I know what they want. A closeup shot with places for a headline and type. We don’t want to look like all the other folks in the Volleyball magazines. We like a more detailed and idiomatic approach.
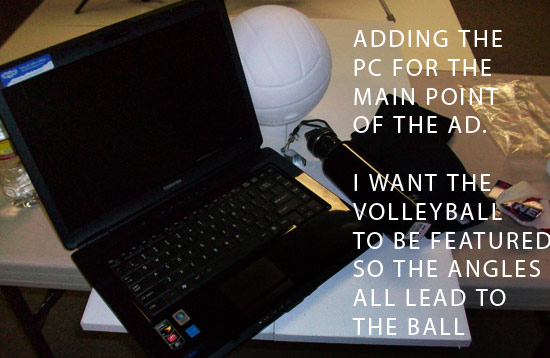
The final piece was the laptop. The point of this ad is that the software is now running on laptop computers. Previous versions are for Palm and handheld devices. We needed the laptop to be very visible, so I decided to use my rather new Toshiba and cleaned it up nicely.
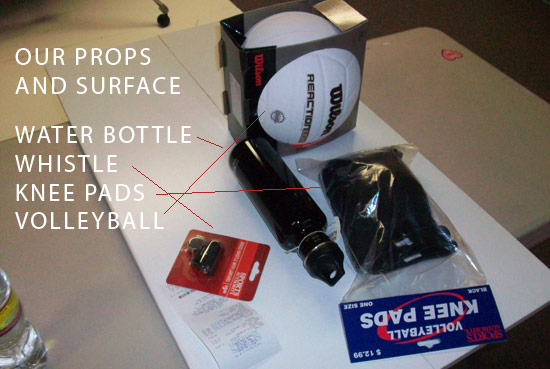
Setting the props initially.
The angles had to drive the viewer to the center of the shot to the “Power of Two” and to let the laptop and volleyball be important items for the composition. I like angles. I like convergences.
I placed the items to focus the eyes and then started placing the additional items all pointing toward the back of the image and the volleyball. I am not placing for perfection here, I just want to get an idea of what the things will do when being next to each other.
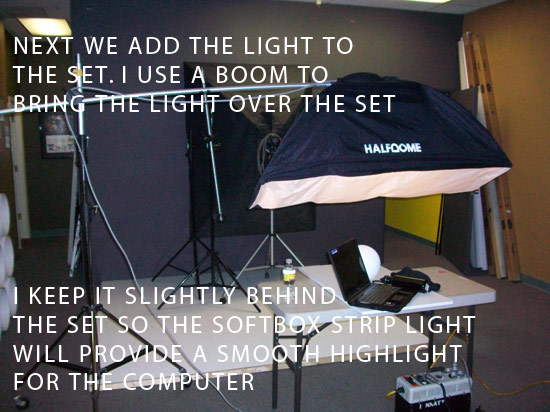
Setting the Light.
Bringing in the main light is next. I haven’t fully set up the shot yet. I wait until the light is in the position I want before finishing the design.
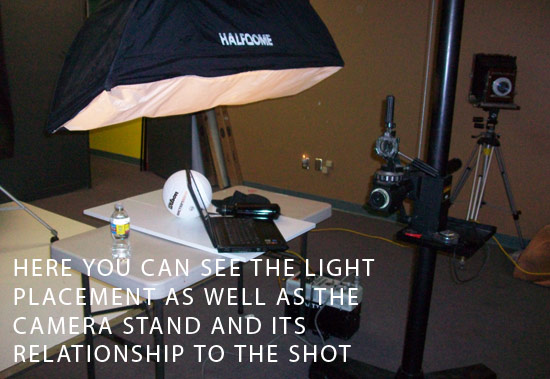
A strip light with a Norman head at 400WS is set at a slight angle toward camera and slightly behind the set. I needed the surface of the light to be visible in the laptop top… providing a definite liquid specular and shape to the laptop and the water bottle. Using a boom gives me much more flexibility for the set. NOTE: get a boom. Get two of them actually.
I placed the light in the center horizontally, and then looked carefully at the way the light fell on and was reflected by the laptop and volleyball. I made a few changes to the setup and then started to make angles for the shot with a handheld camera. I was using a 20MM lens for its view and convergence.
Using a camera stand or tripod.
After determining the angle of the shot that made the most sense to me, I got my camera stand in position. I like using a camera stand in the studio versus a tripod. I trip over tripod legs and that will kill the shot I had worked so hard to position. I still trip over camera stands, but with a camera stand it kills the toes and leaves the camera in position. Priorities.
I also love the little tray for keeping all the stuff I use to shoot with on the platform right next to me. When I am shooting tethered I can attach a laptop to it as well. This time I am not shooting tethered because the laptop I am shooting is the one I usually shoot into. I could have moved one of the Macs over, but time was a consideration.
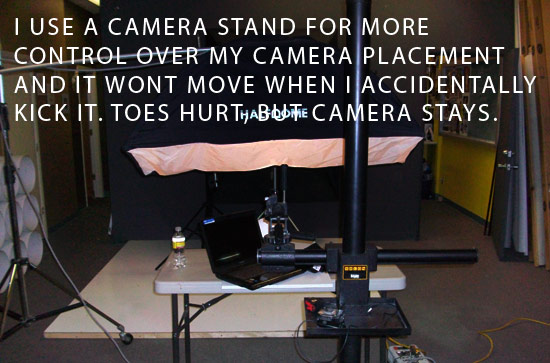
Lighting Position
You can see the camera stand and the light as they relate to each other in this shot. Note the angle of the light and how far back on the set it actually is. I like using a strip light for these kinds of shots as it has a wonderful fast fall off behind the set.
I keep my power pack in a close proximity and the cords are out of the way. The cleaner you keep the floor around the set, the better it is for the shoot. Having to move stuff around all the time while trying to concentrate on the shot becomes a distraction. Keep the floor area clean. Keep the cords out of the way and tape them to the floor if there is going to be traffic in the area.
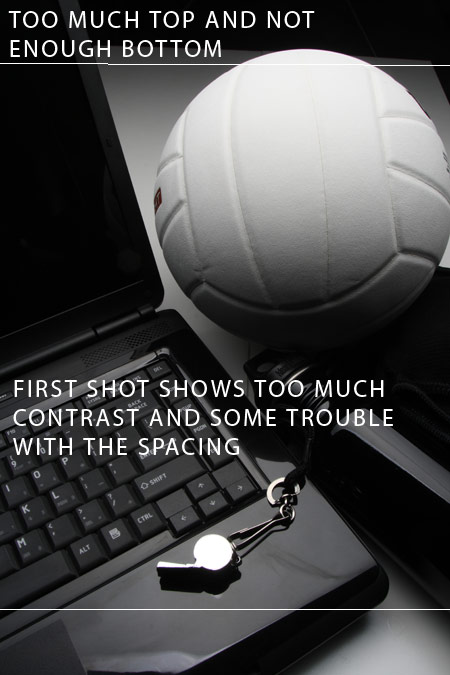
The initial shot.
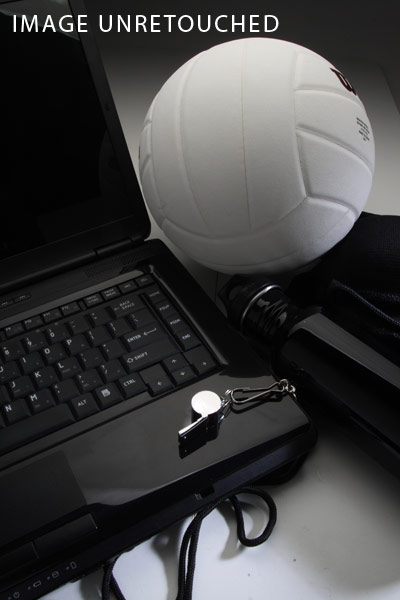
This is the shot I got when I got the camera into position. There are many challenges that need to be met on this initial exposure. The contrast is too great, and the shadows are too deep. The ball is too dark and there is no reflection on the front of the computer so it completely dies. There is a loss of any kind of definition on the side of the water bottle.
This is not unexpected on the initial shot. In film days this would be Polaroid one. In digital it is sort of a sketching thing.
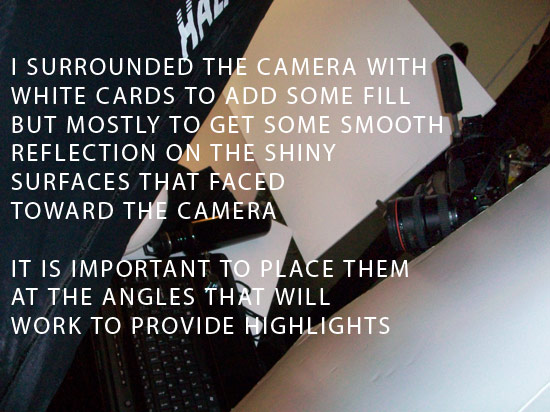
Adding Fill and Reflective Cards.
I added two white pieces of fome core on both sides of the set. These cards are not set randomly, but rather they are angled to provide fill AND reflection. The reflection is the priority as there will be naturally some fill there as well. I needed to get something down the side of the water bottle, and on the front of the computer.
Having a couple of stands or small booms to clamp your cards on is important. You don’t want them to twist away after working a reflection angle for a half hour.
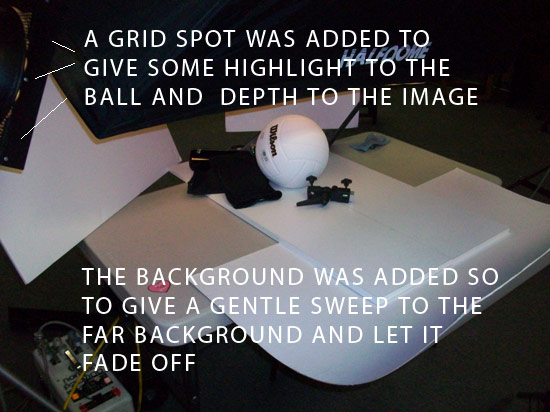
The Set Shot From Behind.
Here is the set from behind showing the ball and the holder that kept it in place. You can also see how the cards are in close to the camera as well as the way the light is angled toward the camera.
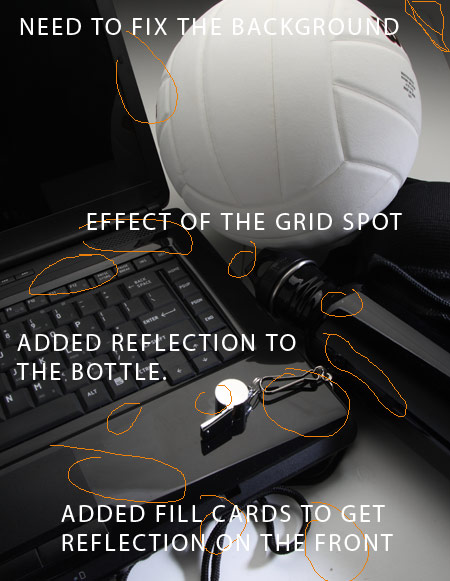
On the left on this shot is the edge of a grid spot aimed at the edge of the set. This is giving me a little texture on the knee pads and a slight glow on the side of the ball. A little splashed behind the ball and that added a little bit of cool back light.
I also liked the way the light spilled a bit over onto the front of the set, giving some dimension to a dull part of the image. This little part really added something to the shot.
The Effect of the Fill Cards.
There is a huge difference in the shot now. The cards are doing their jobs adding speculars on the front of the computer as well as the cord and the whistle side. This little bit of light adds some touches that makes the shot live a little. At this point I have decided to shoot this image.
You can see the dramatic difference in the images as we added the reflective cards. I keep all kinds of sizes on hand. Fome core and white boards as well as silver sided and gold sided shiny boards. Even little scraps of boards are kept to use as fill for tiny objects.
Adjustment to the shot and Photoshop Notes
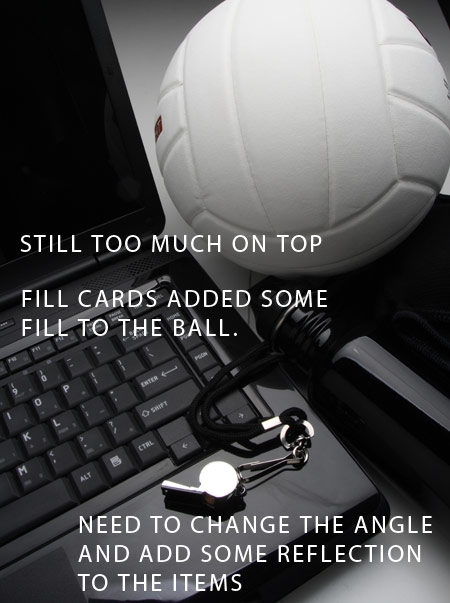
After deciding the shot, I pulled the card and loaded it up on one of the desktops in the studio to look at it closely before committing the image. I made mental notes and also printed it out to mark it up. Remember that I usually shoot tethered, so I simply convert the shot into Photoshop to review on the laptop.
You can see some of my notes here. I need to open the highlights a little, fix some problems on the background, adjust the lighting on the ball and then make sure the light was even across the laptop. I needed to make sure the shot was lit with the right exposure so I also bracketed my images… from f-22 to f-11. Yes, I knew that f-11 would be too bright on most parts, but if I needed a lighter section of the dark areas, I could always pull it from the lighter images. I didn’t have to do that, but it is always a good idea to have something like that if needed.
Final Shot as produced from the camera
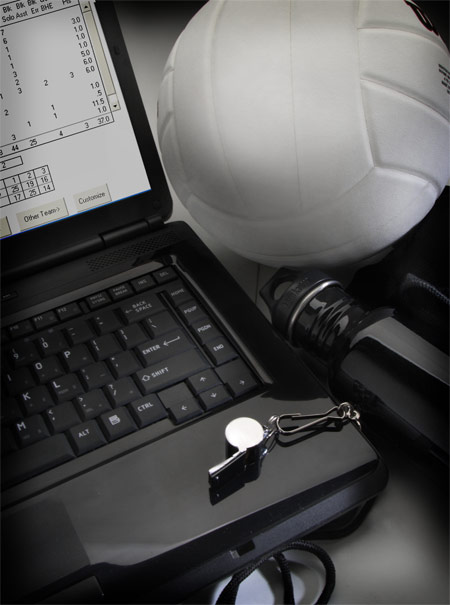
Finished Shot after Photoshop
Here is the final background image. I added the screen from a screenshot as I don’t have the volleyball software running on my machine. I took the screenshot and manipulated it to fit the screen then took the opacity down to 80%. Some usual Photoshop post production work to get a better contrast and some edge darkening.
Thanks for going along for the ride. Shooting images for advertising can be very exciting, but attention to detail can make the difference.
See you next time.



Thanks for this Don, great post! I love the step by step breakdown of the whole process.
I have really enjoyed following through the process to produce these product shots.
Great post. I think it is wonderful when a photographer shows the processes he uses to make his images.
I have been watching your site for a few weeks now. Product photography is one of my favorites so I appreciate you sharing your approach.
Thanks,
Page
What a great post! Thanks for the insight Don.
Thanks for the insight, especially step by step
Caribbean Photography Vacations
This stuff is perfect for me right now! Glad I found you Don. Lots of new stuff happening in my world and looking forward to experimenting more with a commercial bent. I’ll share some shots when I do.