Unleash your Creativity with Small Strobes
This begins our series on small strobes and location work. August will feature 4 large-scale articles on using speedlights in the field. Published on Monday of each week, they will include video, diagrams and assignments for those wanting to do them. Now, on with our introduction article…
Lighting on location used to demand heavy lifting: boxes of cables, connectors, power packs, heads and access to power to run it all. And while there are still times when a ton of gear is required, there is another way that is becoming quite popular. Using the small flash units that usually go on top of your camera in creative ways can actually do the job that once required a lot more equipment. Off camera speedlights, triggered by radio transmitters, have opened up a whole new world to professionals and amateurs alike.
Sometimes the simple act of ‘bouncing’ a strobe off of a surface like a white ceiling or wall, can create an image that is far superior to on-camera flash. We are all familiar with the various tools that are sold that attach to the top of your strobe to give it a wider spread, or a more diffused light. What we are going to look at are ways to get the flash off the top of the camera so that there is a different direction of light instead of directly from camera.
Professionals have used off camera lighting for decades. Power packs, softboxes and booms are a staple of the commercial photographer. They require a lot of power and usually involve cables and cords, lots of weight and time for setup and teardown. The advent of more powerful small strobes and the wireless triggering apparatus have put the power of off camera lighting in the hands of amateurs and pro-ams alike. And professionals are embracing this quicker, more lightly carried tool set as well.
First a quick look at the tools.
1. Speedlight (strobe) at least one, preferably two (must be able to control the power output)
2. A Stand to attach it (them) to. (Significant others, kids, buddies all work too, but you have to feed them.)
3. Wireless Trigger set: Pocket Wizards are the best, but are expensive. Cactus brand are inexpensive and will do in most cases.
4. Flash meter (some feel it is an option, but that is a different article. I think it is very important.)
The wireless remote triggering is very important as it eliminates the demand for long cables or connectors and allows the flashes to go wherever you may need them. With two strobes you could have a main light and a hair light, or a separation light for the background. Adding more strobes can allow you to create very elaborate lighting schemes with inexpensive battery powered strobes. And the ability to instantly see what you are doing on the camera’s LCD allows for a quick setup.
I am going to share 4 images taken using small strobes in various ways. We will start with one strobe and end add complexity as we go. There are literally thousands of ways to use strobes off camera, and I hope you take these suggestions as a way to work with your own style of photography.
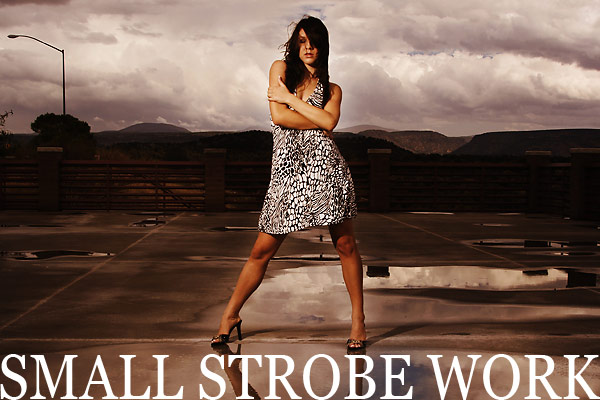
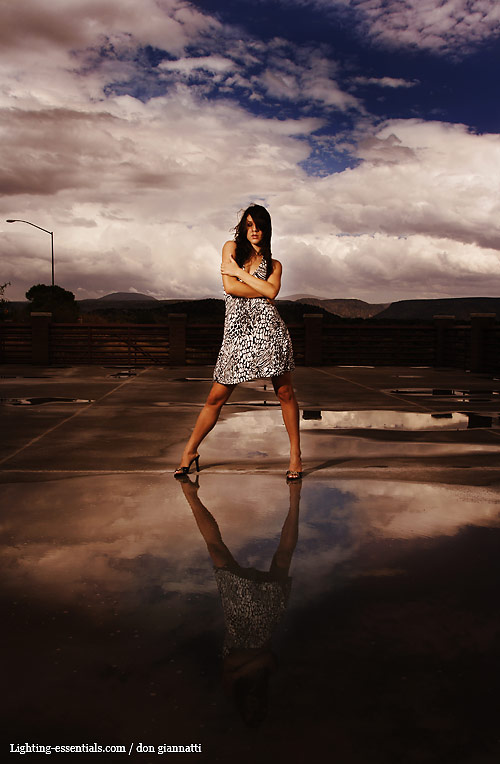
Photograph #1
Briana and Clouds – one strobe.
We had a terrific storm on the way up to Flagstaff to do some shots for a calendar. It was really brewing a storm that morning and the clouds were starting to build in the East. I pulled into a rest stop on I17 to have Briana get ready. I wanted to get a shot but the light was getting more and more muddy. I thought the rest stop could provide an interesting background, but I just couldn’t find something I liked. Just north of where we were parked was this huge slab of concrete with a fence around it. It had just rained a few minutes earlier and there were a few standing pools of water. I was scouting it when I glanced down and saw the reflection of the clouds in the water. I had my shot.
Placing Briana where I had a dramatic sky and the small pool of water with her reflecting back was next. I knew natural light wasn’t gonna cut it. By this time it was threatening rain again and the light was a muddy gray. I knew strobe would give me something much more dramatic. I used my 550EX on a stand over my shoulder on the left. I placed it high so the light would seem to be natural, as I knew I had to get low to capture the reflection and the sky. I worked on the composition for a few moments and when I had something I liked, I moved the strobe in as close as I could without getting the stand in the picture. I used a Canon 21-35 f2.8L at 21mm for this shot.
Small strobes are limited in power and I wanted the maximum that I could get and still have a decent recycle time. If your strobe is on full power, it can take a few seconds to get ready to fire again. At 1/4 power it is ready almost immediately. I want the most light with the fastest recycle so I move the light to where I get the best compromise.
I had an exposure of the clouds at f-ll at 1/250 of a second that looked pretty good. Of course Briana was very dark and unlit since there was no natural fill. I had my exposure for the overall shot, so all I had to do was bring the strobe in to give me f-11 on Briana. I used a light meter to get the light where I wanted it, but you could ‘chimp’ it in if needed. When the light matched (that is a ratio of 1:1), I began shooting. We got about 20 exposures off before the rain came down in torrents. I grabbed my cameras and strobes and headed for the car… Briana got wet.
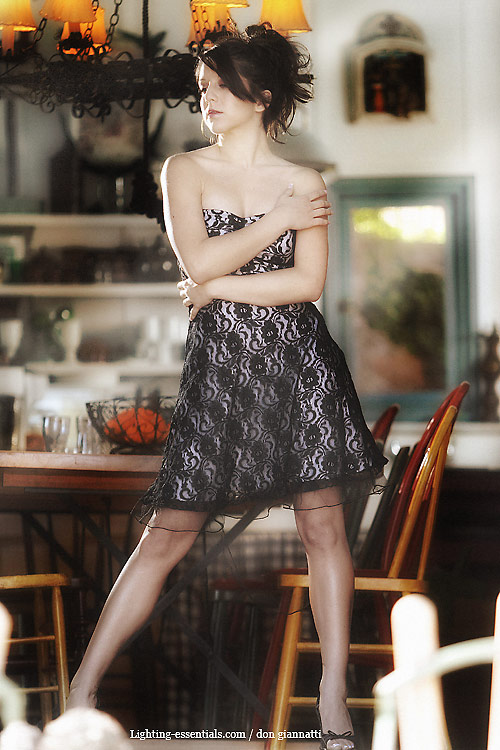
Photograph #2
Briana shot in Doorway – two strobes.
I love natural light. I love everything about it. Especially north light; it’s evenness, softness and gentle ways of sculpting the body. But there are times when you want to add a bit of punch to a natural light shot. In this shot, I used natural light for the main, and added some strobes to light the background.
We found this cool doorway in the Gold King Mine in Jerome, Arizona. It had wonderful north light and I wanted a shot of Briana standing in the doorway. The light on her was wonderful, but terribly flat. The room behind her became dark and flat. I added a strobe way back on the right in an umbrella. This provided a small amount of light in the environment behind her. Without the light, it was black. This gave some dimension to the shot. The side light added a sharp edge and some drama to her. Both flashes were dialed to very low power, and that let me shoot rapidly as Briana moved in the space. Canon 80-200mm f2.8L at 2.8 for this shot.
Exposure for Briana in the natural light was f2.8 at 1/125 so I knew my flashes were within the parameters required by the shutter. I simply chimped the lights in and dialed them down till I got the look I wanted. Both were dialed down to 1/16th or so. Then I just shot at the natural light exposure, letting the strobes add a little more punch to the image.
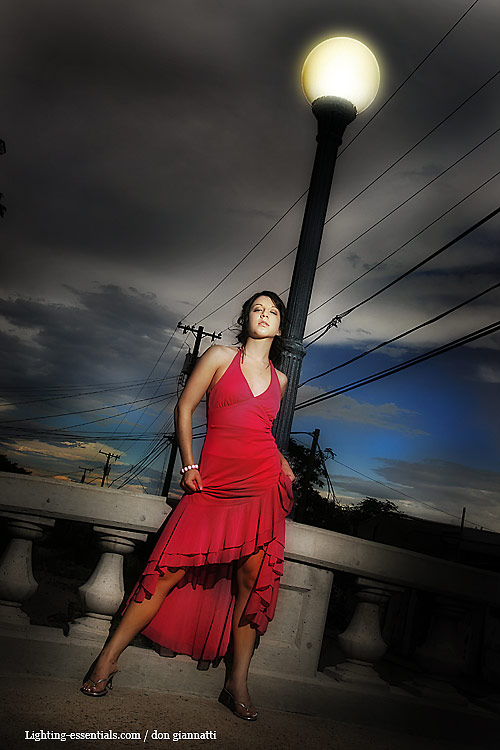
Photograph #3
Briana shot in Miami – two strobes
Sometimes you can actually ‘make a shot with the lights. This image was absolutely not interesting at all without the drama created by the strobes. A very cloudy afternoon had led to dreadfully dark and muddy light. We wanted to do something with the small bridges so we decided on one and had Briana put on a very dramatic red dress.
We beat the sun for this shot. What that means is that the strobes we are using are more powerful than the light of the sun. Even though it was very cloudy, there was a lot of light on this Arizona day. F8 was the correct exposure for the scene behind her. We wanted the ambient to be much darker so we knew we had to create more light for our subject than f8. We used two strobes for this shot. Both of them on 1/2 power. This gave me an exposure of Briana at f13 – 1 1/3 stops brighter than the ambient. When we exposed correctly for the strobes, the ambient goes dark by that same 1 1/3 stop.
The lighting is dramatic because of the placement of the lights. There is one on a stand to camera right. It is on very low power and is there to offer a little fill and keep the light pole from going too dark. A second is high over camera and slightly to the right. That is the main and we did bring it in a foot or two to make it a little more ‘poppy’. With the strobes on 1/2 power, we did have to wait a moment or two between exposures for the flashes to recycle. Be sure to check the ‘zoom’ feature on your strobes. If you have it zoomed to telephoto you will get more of a spot to your light. For this shot we had the zoom on wide angle so we could get as much of that red dress in the light as possible.
Photograph #4
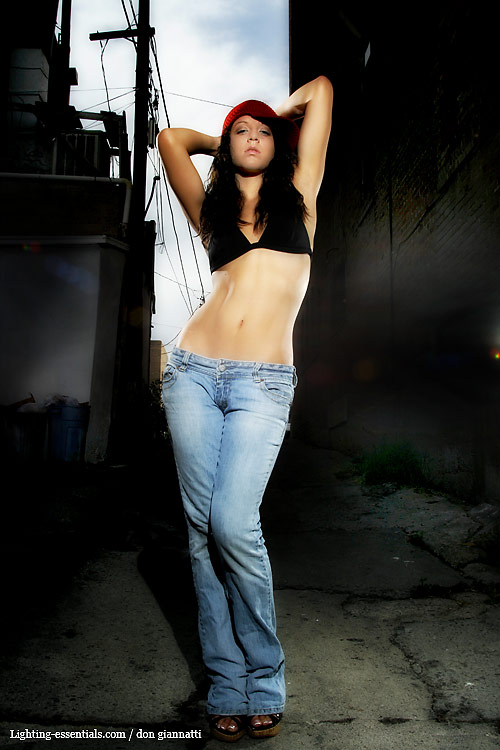
Briana in Globe – four strobes
It was very warm when we decided to shoot this image. We found an alley that looked quite urban and really liked being in the shade. I wanted a gritty, urban shot and had Briana change into the jeans and hat. The goal was to light Briana to match the sunlight, not the shade. Using the f16 rule, we knew that f16 over the ISO would be fairly close to the ambient. So we had to get a shot that was within that exposure so she would match the sunlit areas. It got a little cloudy so the ambient dropped a stop and we compensated for it.
Main light is a strobe over the top of my right shoulder. It is set to give me f14. The side backlight to the camera right is a strobe on a stand behind her and putting out an exposure of f18. The third strobe is behind her camera left and set to give f11. It is simply there for fill. The camera right backlight is giving an edge and camera right backlight is fill. Final exposure is f14 at 1/200. This lights Briana, lets the dark alley be dramatic and then the full daylight sky behind her gives a lot of dimension to the image. The fourth strobe is set to medium power and is very far behind her and adding light to the wall behind her camera right and spilling a little on the wall camera left. We could have shot her in the alley… but why not create something a bit more dramatic?
All of the images were triggered with radio slaves, either Pocket Wizards or Elinchrome. It is this freedom from cables and such that makes these images so much easier to use. I used all location work for this article, but you can use small strobes in a studio situation as well.
These small, powerful, inexpensive units can add a whole new dimension to your work. Check Ebay for some great deals, and remember that they do not have to be matched for your camera, they only have to have the ability to control the output power. You will be firing them from your radio slave units. Almost any brand, even if they are older, will work fine for your photography. I hope you have fun and find new and exciting ways to use your small strobes.
Thanks for stopping by lighting-essentials.com. We hope you come back soon. New content is added 2-3 times per week.



Great article Don… Just the right info I’m looking for…. Looking forward to reading the following 3..
Great stuff….
Beautiful work!
just found this site.
thank you very much for sharing knowledge!
Stunning work, thx for your knowledge
Just want you to know your site is now my homepage. It\’s THAT important and helpful! : ) THANK YOU!
Susan
Wow. thanks so much for the kind words, Susan.
Excellent article glad i found this site
Love the article. Small strobes are awesome.
Hi! I love your sites! I think I am going to sign up for the Culumbus, Oh workshop! I am still so confused! I have been using and messing with off camera for a while now but have never used a light meter and still dont get it when you talk about ambiant exposure and setting a flash to get a certain f/stop…AHHHH are there any basic basic explanations of this stuff anywhere?
Thanks!