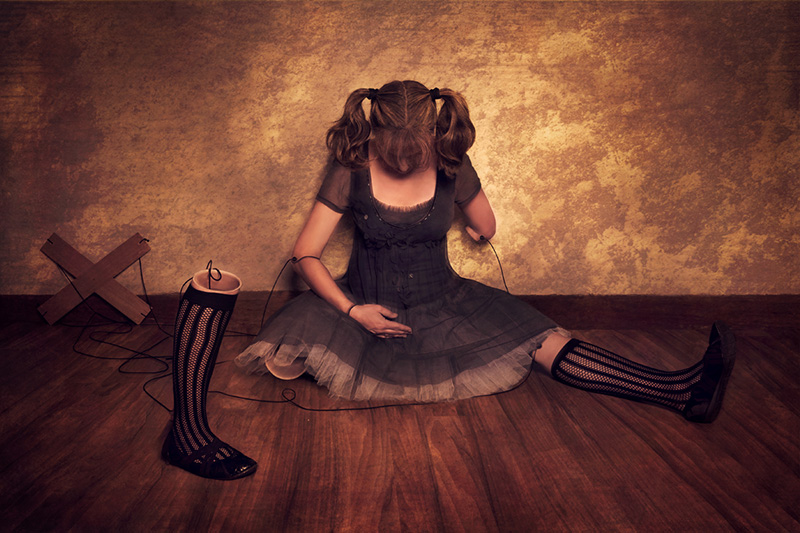
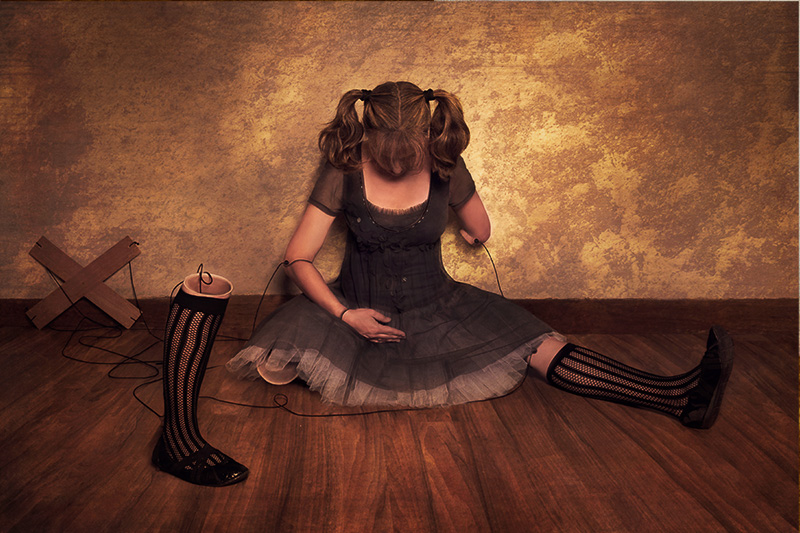
The Making of “Broken Doll”
By Carla McMahon
(NOTE: This image won the Annual Kelby One Photo & Design Contest)
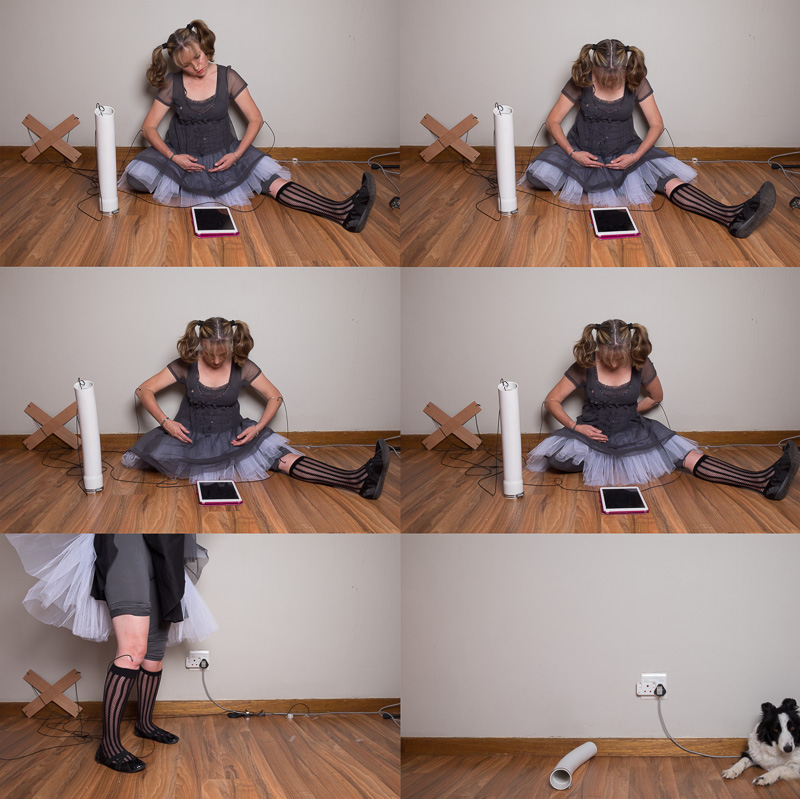
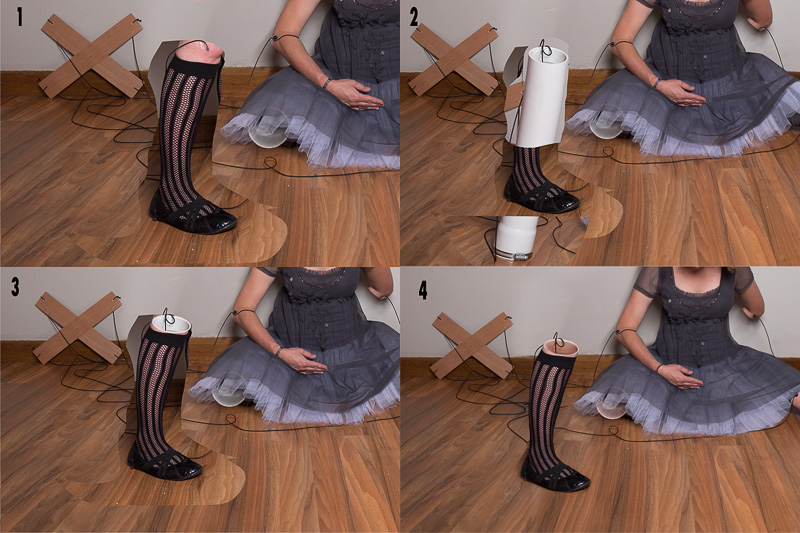
This is a composite of about 5/6 images.
My camera was on a tripod and every image was taken from the exact same angle and focal length.
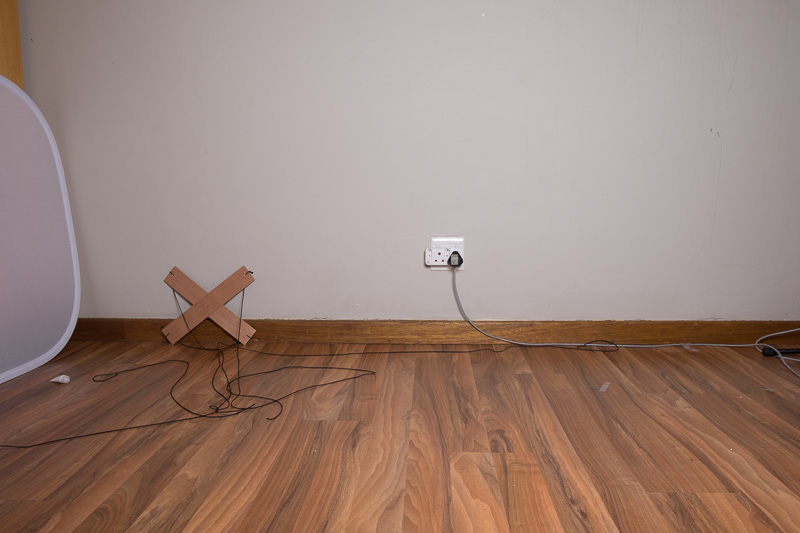
First an image of a clean(ish) background – so I could mask in any areas that I needed to.
I wish that I had taken a completely clean shot without any cords or cables or a shot with the lighting cable in a different position, as I had to to spend a bit of time cloning out the cable.
And then various images that made up the doll, and broken leg
Once I had all the images, I brought them into photoshop. I chose parts of each image that I liked (the dress from one, the head position from another, the arm position from another. And I spent a bit of time masking, out (and in) the various areas that I wanted to see. And cleaning up the background.
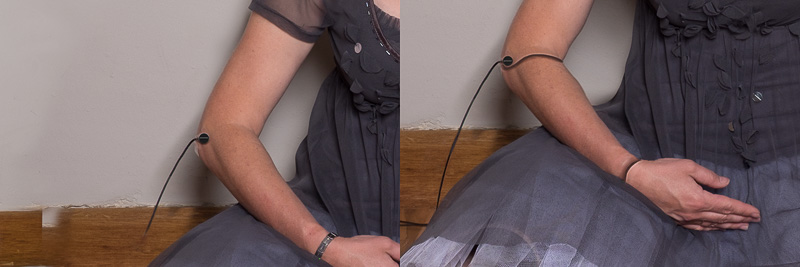
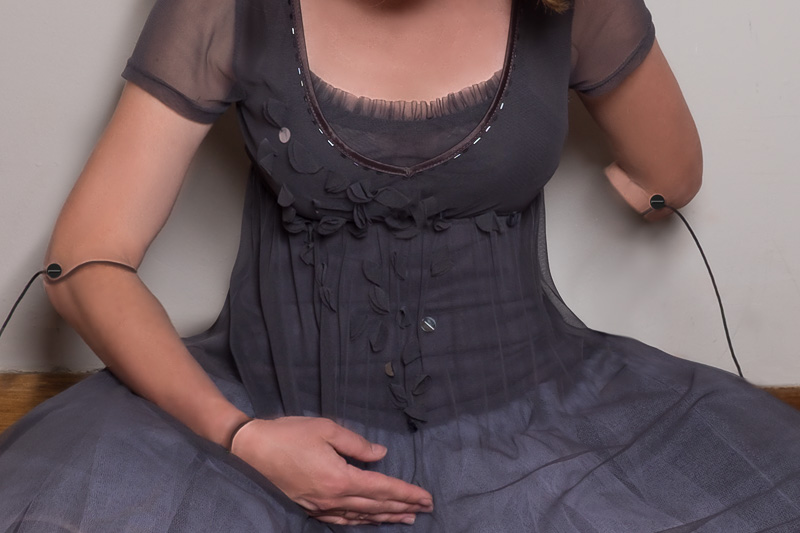
Broken arm
For the broken arm, I masked out the actual arm with a fairly hard brush. And the “blank” shot was underneath so that showed through. I added some shadows and cleaned up the background to make it look more realistic
I cleaned up a bit more and took out the upright pipe, and I added the horizontal pipe.
I positioned that over the leg in the position that I wanted it and then I added a layer mask and masked out the areas that I did not want to show.
For the front I used a low opacity brush so that the pipe looked like it was under the dress.
Joint pins and joints
For the joint pins or buttons, I drew them in photoshop and then added layer effects to try and make them look a bit more 3 D (bevel and emboss, drop shadow)
I did the same thing with the joints.
Broken leg
- I positioned the leg where I wanted it
- And added the pipe in the right position
- Then I masked out the parts of the pipe that I did not want to show
- And used a pinkish brush and changed the layer to multiply mode to make the white PVC pipe look pink
Then I went crazy on the frequency separation to make the skin look very smooth and plastic like. (I don’t know how to do frequency separation. The few times that I have used it I need to find a video and follow along step by step)
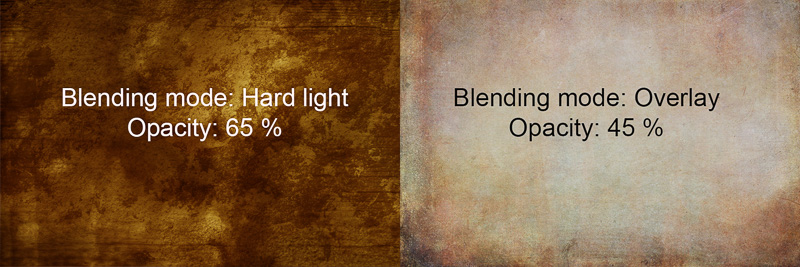
I added some texture layers.
I used a layer mask to take some of the texture away from the “doll”
And various other adjustment layers – curves, hue and saturation, photo filters. Basically I just played around until I liked what I saw.
And then lastly I finished off with a film effex adjustment filter in Nik Color Effex and one last curves layer back in photoshop.
See more of Carla’s images here.

