The Lighting Angle: Part One
Now that we are starting to understand the metering a bit better, we are going to look at how the angle of the light can create different presentations – AND different exposure situations.
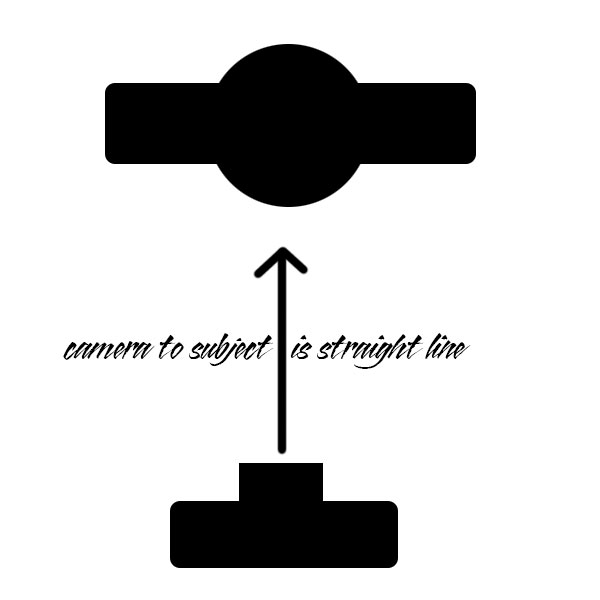
The camera is a fixed position. It is where the Point of View is coming from, and it always presents one leg of our triangle. There is a straight line drawn from camera to subject when looking through the lens.
We call this the “Axis” of the camera to the subject. Since the subject is always what is in front of our lens, this is a fixed angle.
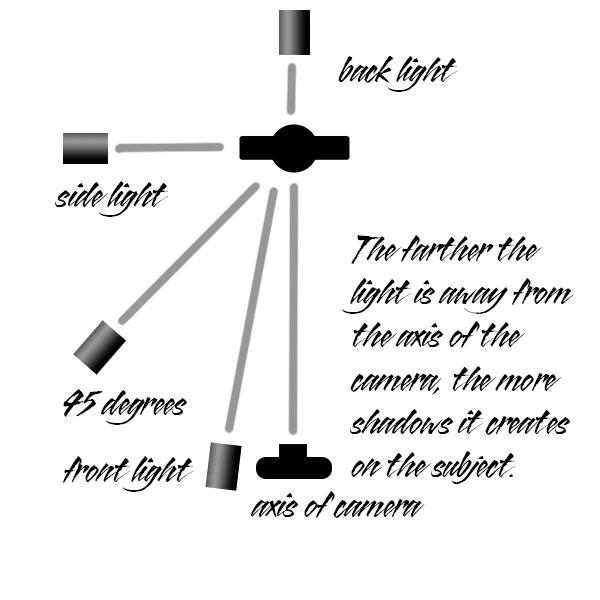
Shifting the light from front to side to back creates all sorts of interesting changes in our subject. These changes are brought about by contrast, shadows, angles of shadows, and can be used to reveal or hide texture.
Front light is coming from on axis of the camera or very near the axis of the camera. Angled light (45 degrees) can actually be anywhere from slightly off camera axis to the point where it becomes side light.
Once we move the light back behind the model any distance back from the 90 degree side light, it would be considered backlight. And something other than that light source would become the ‘main’ light even if it was not as bright as the backlight.
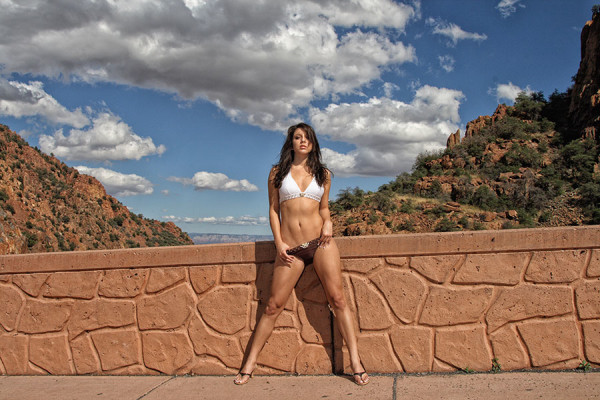
Front Light Example:
Briana is lit from the sun which is over my shoulders. Notice the ‘flat presentation’ of skin and the shape of her arms and legs. Dimension is not presented well, and that is the point of front light. It flattens and contains dimension. Front light can be a particular favorite of some fashion shooters as it creates something akin to studio lighting, and alleviates many distresses on the skin.
Meter from the skin at the same axis as the camera. Using your in camera meter, choose any middle gray reflectance you wish, or by understanding the exposure (see class one) you can “place” the exposure where you want it to be.
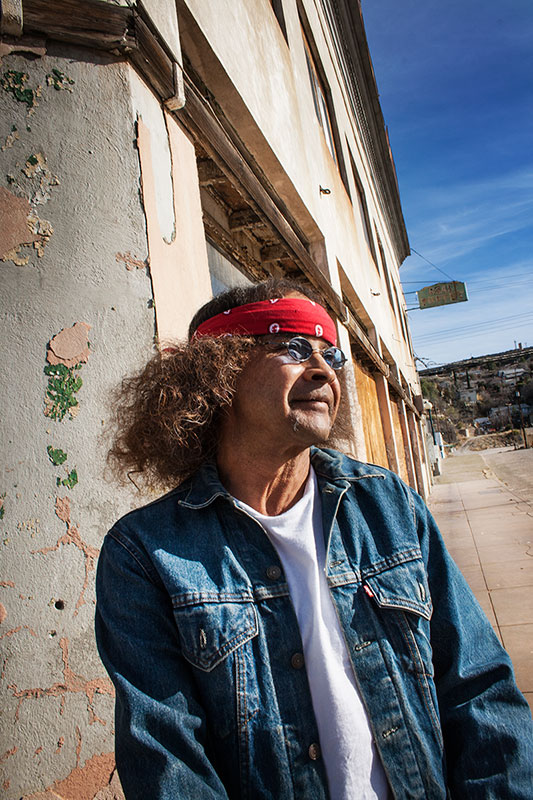
Side Light Example:
In this shot of a man I met in Superior, Arizona, I used the sunlight from a side position to give texture to his face, hair and denim clothes. Light from the side meant that I had two areas of light on his face… the direct light, and the shadow (ambient) to base my metering on. I was very careful to use the dome of my meter right in front of him with the light striking the dome the same way it was striking him… half with directional light, and half with the ‘shadow’ or ambient light.
The resulting exposure indication would be very close to what I needed, and I double checked it through my in camera meter by placing the spot meter on the white t-shirt in the sun and opening up two stops (from middle gray, the reflection that gave me the reading – to the actual placement of the white shirt at a point that would still be white, with texture; two stops brighter than the indicated exposure reading.
See the Using a Photographic Light Meter on UDEMY (Assignment One). This class is free for all photographers.
Side / Back Light Example
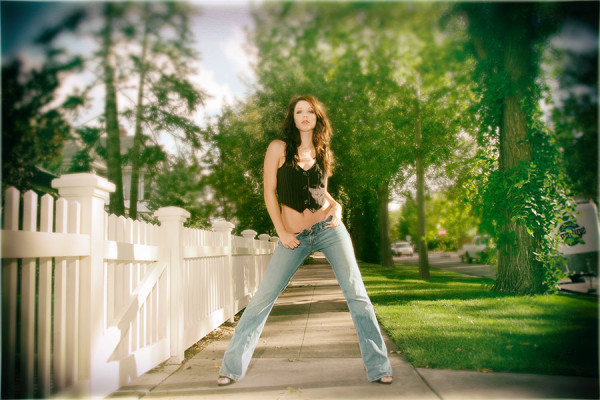
In this shot the light is coming from the side and slightly back. This is a ‘rim light’ use, and can be thought of as a “special”. The sun is indeed the main illumination tool here, but the “Main Light” that is providing the light on Briana is the ambient light of the sky above her and behind the camera. The sun is adding the rim affect, and is brighter than the main light.
Notice that the sun still lights up part of Briana’s hands, chest, vest and hair. Notice that these areas are brighter than she is – as they should be. Basing (or placing) the exposure on her face presents us with a slightly brighter side light. This is more natural than if we had based the exposure on the side light on her chest or hands which would have rendered the image much darker.
Back Light Example:
The sun is coming from behind Briana, and I based the exposure totally on her face. The sun then becomes quite bright and even provides nearly overexposed skin on her shoulder and arm. By placing the exposure on her face, we keep the skin tones of the subject area correct.
I used a handheld Minolta meter for each of these shots. With the ambient exposure dome pointed at the camera, I was very careful to keep all direct light (like the sun) from spilling over on the ambient dome so it would ONLY measure the light as it was presented to the subject – and therefor back to the camera.
In all examples I point the dome directly AT the camera and on the axis line.
Alternatives would be to come in close with the camera filling the frame with the subjects face and taking the reading from the camera. Making sure that all I was reading was the face or cheeks, and that there was no extraneous bright areas or flare from a backlight, I would take the exposure meter reading (thus finding the exposure for middle gray) and open up by one stop to “place” that skin tone at the proper reflectance. (For Caucasion skin I open one stop. For Hispanic or Latin skin, I keep the exposure and for dark, African skin I stop down one stop. These are my rules of thumb and I use them as guidelines to make sure that the reflectance levels remain true to the values I want to portray in the image.
Keep working on the first nine chapters of the Udemy course linked on assignment one. (This is a free course.)
Additional Assignment:
Shoot a person in full on sun, but not “noon” sun from above. Either early in the morning or later in the afternoon so the sun is coming more at an angle to the subject. How much of an angle is up to you, but I like to work with a shallow shadow under the chin. If the shadow under the chin goes all the way to the neckbones, the sun is still too high. This is done with the subject looking at the sun.
Shoot them in the same position but keep taking two steps to your left or right. No farther from them and keep them the same size in the viewfinder, but keep stepping away from the sun on axis until you reach a spot where the sun is slightly behind the subject. The subject turns in place to keep looking straight at you.
This will take you from front light to angled light to side light to slightly back side light.
You may keep on turning if you want to go all the way to full backlight.
IMPORTANT: DO THIS TWICE.
The first time take the reading of the full on axis sun, and leave that setting as you continue around your arc.
The second time, use either the handheld meter or the one in your camera to make exposures come out correctly to your taste as you go around.
(HINT: a gray card should remain the same exposure as you work your way around the second time. Have your subject hold that card and base exposure on that as you go around the arc.)





Useful lessons. Very nice website.