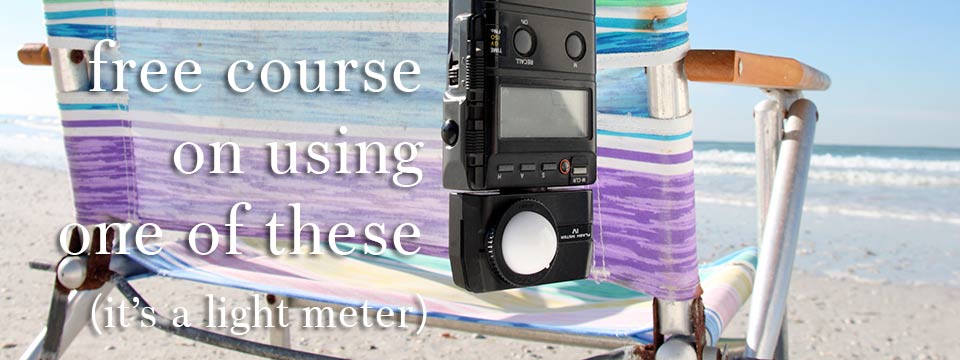
Do you have a hand-held light meter that is just sitting around gathering dust? Have you ever wondered how it would be beneficial to you? I have created a new, free class at UDEMY to help you understand the uses and reasons for using a light meter. There is over 2 hours of content, and more will be added next month… I want to show a real world example of multiple lights and how using a meter helps you address the scene with confidence.
No matter what kind of hand held meter you have, you will learn a lot from this class. We are not brand specific in this course, but we cover all the ways a reflective and incident meter can be used to find the values you need.
But even more importantly, we discuss how a meter can help you visualize the image before you start shooting… and we have a few examples and exercises to help you with that. I hope you enjoy it.
How to Use a Photographic Light Meter: at UDEMY.com (link)
NOTE: this class is given freely to all photographers who want to know how to use their light meter… it is simply produced and is more informational than glossy. It will be continuously updated when new materials become available.
Introduction video.
This course is designed for those photographers who have just begun using a hand held light meter or who may not know what to do with their meters. or why they are important and useful tools for making images.
The light meter is a device that measures the intensity of light, whether that light is being reflected from a subject (reflected light) or falling upon the subject (ambient or “incident” light). The light meter is a tool that helps a photographer create more accuracy in exposures.
We take a very close look at all the ways a light meter can help a photographer develop a stronger understanding of the light, as well as learning how the different tonalities are expressed through a light meter.
Real world examples and some simple and fun exercises will help the beginning light meter user develop good habits, and stronger lighting.
From reflected light readings to “placing the exposure” for maximum artistic presentation to using the ambient dome for flash in studio, this course is a simple to follow discussion of meters.
NOTE: We do not discuss the operation of any specific (Brand) kind of meters. You will still be required to read your manual to find out how to set your specific meter up, and the specific ways it works. But all meters DO the basic same things, and that is what we discuss on this course.
We use video and a few PDF’s to show the use of the meter in both reflective and ambient modes. There are three exercises to be done by the student that will help them learn their specific meter.
The course should be done in order, and there is over 2 hours of video content as well as PDF documents for your files.
If you are ready to learn to use a meter, to take control of your exposure this course is for you. Many photographers will tell you that ‘chimping’ is all you need to do. I disagree… there are far more reasons to use a light meter than merely exposure… and we will discuss them in this class.
The class is free… enjoy and keep shooting.
Please see my two other courses on UDEMY:
– Portrait Lighting with Simple Gear
– Natural Light Beauty and Fashion Photography
Thank you,
Don Giannatti


I am on section 1, Lecture 8 and decided that I wanted to ask a question prior to continuing g. In the past, I’ve read and watched other photographers discussing gray cards, middle gray, etc and it was presented as this was info for getting the correct white balance. I understand the terminology (I thought I did) and just wanted to make sure that I am following. When you say “middle gray” (at least in this lecture) you are referring to the specific area in a scene that you want to expose for, whereby the rest of the image falls into the exposure based on where you wanted middle gray to be. Seems that I am now mixing exposure and white balance into a blender. I’vr probably confused myself along the way……
White balance and ‘middle gray’ are indeed two different things. Notice in the video that has the images with the gray square (Photoshop: Lecture 8) that we are looking at luminance… the brightness of the subject. That means it works in black and white as well as color.
When we talk about middle gray with an exposure meter, we are indeed talking about that middle luminance that makes sure all falls up and down from it within the acceptable range of exposure.
“Placing” exposure means choosing the area that we are going to force – by way of exposure – to be middle gray and then allow the fall to be forced as well.
We can place a slightly lighter area as middle gray, forcing the fall downward or choose a slightly darker area for ‘placing’ the middle gray and move the fall up.
I hope that helps. If not… ask again.
Color balance means making sure what IS middle gray (and therefor all the rest of the hues) is not contaminated with additional color.
Thanks! That does clear it up. Also, today I specifically used spot metering on several different shots. Not that I was particularly interested with the scene, but the “light” went off in my head and I get it. I would look at a scene outside, or inside and decide how I wanted it to look, decided where to meter with the camera and bam! I’ll play with the light meter tomorrow. Thanks for this course and for replying!
And that is the way you do it!
Soon you will be able to better visualize the light, the placement and how you want to use the flash or reflectors or whatever you want to use to change it up.
Great luck to you!