We are so excited about the new series we are starting… the “Tech Sheet” series. We will do one every two weeks and they will be uploaded on the first Friday and the third Friday of each month. Those months with an extra Friday will find an extra Tech Sheet.
The “Tech Sheets” will have lots of information breaking down one shot. We have jewelry, still life, product, fashion, glamor, headshots and more coming. We will cover studio and location. This first Tech Sheet is a breakdown of an image, and the Photoshop used, that we did for a demonstration at the Houston workshop in November 2008.
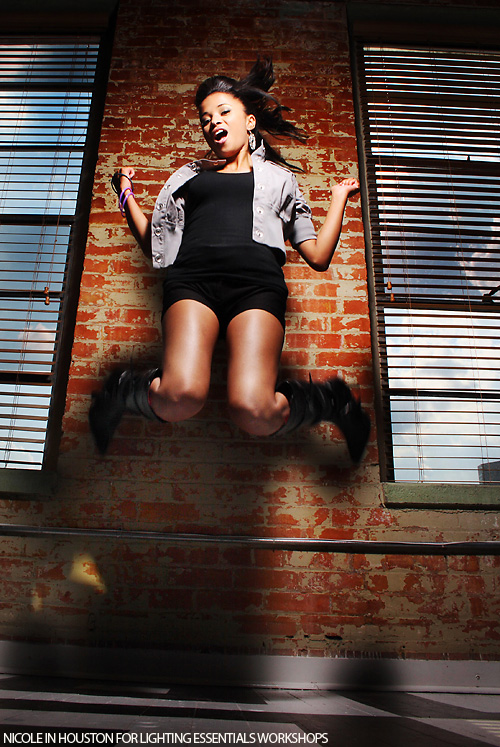
Nicole was ready to jump and the studio had these two cool windows with clouds outside. It seemed custom made for a wide angle shot, and the exposed brick was an added kick, ya know!
Before we get to it, we still have a few openings in the Cleveland workshop coming up November 15 – 16, 2008. Get on over and sign up if you can get to the area to join us.
And don’t forget the free wallpaper for November available here.
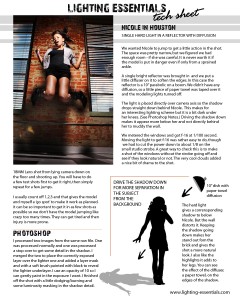
Let’s take a look at the tech sheet here:
Please feel free to download it and print it out. (right click and “Save Link As”)
The use of one diffused hard light can create a pretty cool image. I try not to get the light too far off of camera axis though, maybe a max of 20% either side. I prefer not to have large shadows from noses and lips and cheeks so I keep the light working toward my model and my model toward my light.
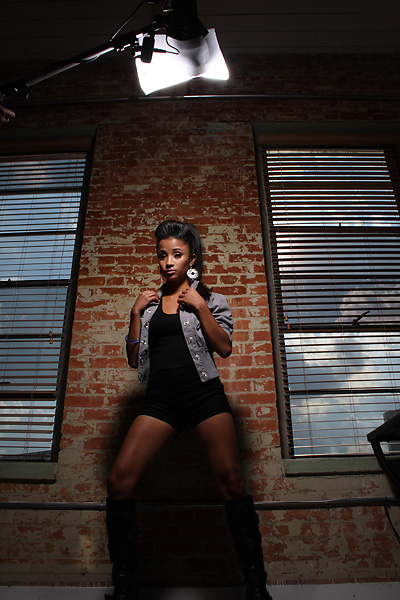
To keep it from looking “on-camera” I kept the light high and the camera very low. I actually am not looking through the viewfinder as the camera is right on the floor slightly tilted up. I determined that angle by a couple of tests. I also shot the windows without the strobe going off to determine the correct exposure of the image. F-16 at 1/100 seemed to give me the best look at the clouds through the window (why not… f-16 rule and all).
Test two had her jumping to make sure she didn’t jump out of the frame:
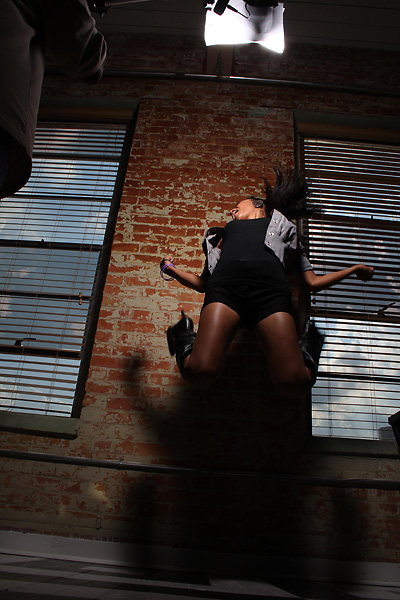
You can see that she is throwing her head too far back for the image to work. I had her look down at me for the next series of jumps. I also determined that I had enough angle to make sure she and the floor were in the shot from that distance. Time to shoot a few frames.
IMPORTANT LIGHTING NOTE: I have the strobe on a boom and it is being held by a workshop attendee. While the basic point of the light is on axis, I did ask him to watch her face and correct the light slightly to match the axis of her face. This means the light would slide a little to left or right as she would jump to keep the light directly on her face.
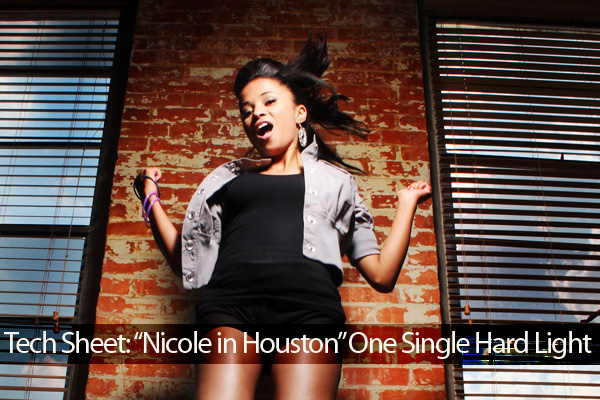
And here is the image we created:
You can see how we did it on the tech sheet, but let’s take a little time and look at the Photoshop work we did. I strive to get it right in the camera, so there isn’t a lot of extra work done on this image. You can feel free to do whatever you want in Photoshop though, it’s all good with me.
First I knew that the shadow area was going to be a little dark so I processed a lighter version of the same Raw file that I had selected. I added a full stop to it and processed. That gave me two JPEGS… one at exposure and one a stop over. I held the shift key down and moved the normal image over the darker image.
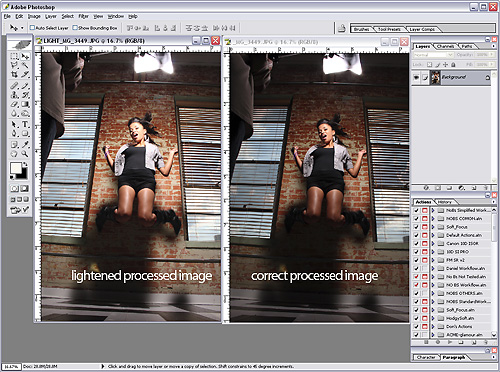
You can see the lighter processed image on the left. holding the shift key down I dragged the image from the right over the image on the left.
I then added a layer mask to the top layer and gently exposed the lighter image where her boots and the wall was. I use a brush at 10% so that I can slowly get to what I want instead of just ripping it open.
After that work, I add a layer of 50% gray and using a soft brush, white, at 7% paint in some highlights and lightened areas. Face a little, jacket, black dress, highlights on boots and a few areas of bricks. To make some of the lighter areas darker, I paint on that layer with black at 7%. It is very important to just add it a little at a time… building to what you want instead of just banging it out.
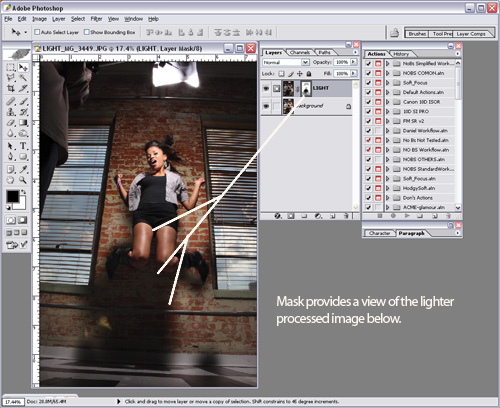
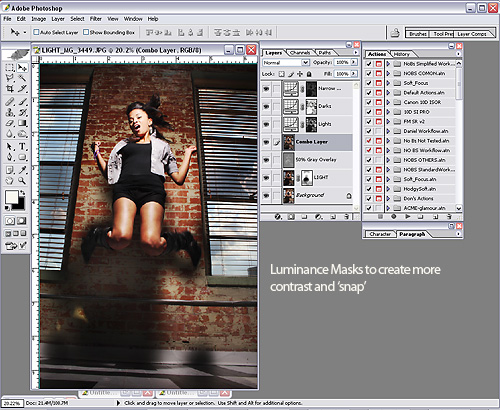
Using a layer mask that is only applied to the lightest pixels, I open the highs up a slight bit. I use Tony Kuypers masks for doing this. You can see how gentle the curve adjustment is. I made a composite layer above the others to do this work on.
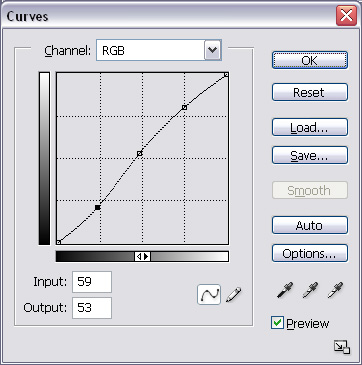
A slight curve adjustment added to only the brightest levels of pixes makes a huge difference in the normally flat digital image.
Here is the image with all of the adjustment layers added turned off:
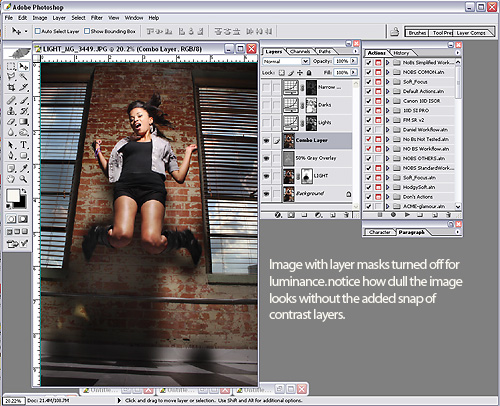
You can see that the three layers for light, dark and midtone are off. The image looks fine, but it can look better.
Here you can see how the image looks with the three layer masks turned on.
Assignment:
Do a shot with a single hard light. Add some diffusion to get a softer edge, but keep the light very ‘poppy’ and bright. Try not to get too many shadows by keeping the light high and close to camera axis. You can place the images at my Lighting Essentials Group at Flickr here. We don’t have prizes yet, but we are working on something cool. Title it November LETS Assignment 1.
I hope you enjoy these. They are really going to be fun.





This tech. sheet idea is awesome….Can’t wait to see more of these… Still trying to learn to use the TK mask but this is awesome… Great Job.
Q