Tilt-shift lenses provide the small camera shooter with the functionality of a view camera. At least some of the functionality of a view camera. The front half anyway.
The ability of the camera to change the relationship between lens placement and film or sensor placement can provide many different possibilities. Two of the most popular are the tilt lens and the ability to shift the lens above and below the sensor axis.
Let’s examine the tilt tool on the Tilt Shift lens. Tilting helps control the Depth of Field on images. By tilting the lens forward, the photographer can manipulate the amount of focus by increasing
the angle of the lens’ DOF.
This 3 page Tech Sheet will introduce you to the many things you can do with this extraordinary lens. If you want to try it out, you could rent one for a week from our contest sponsor, BorrowLenses.com. Or you could go to win the contest and get a weeks rental free.
Workshop news. San Diego this coming weekend, then off to Seattle, and then sunny Florida. If you haven’t checked the workshop schedule, now would be a good time.
EDIT: February 18, 2009
“Pre-PMA 2009: Canon has today announced a pair of new tilt and shift lenses, in the shape of the TS-E 24mm f/3.5L II and the ultra-wide TS-E 17mm f/4L. These two optics share a brand new barrel design that allows the directions of the tilt and shift to be rotated independently of each other, offering a high degree of control over the positioning of the focal plane. They also feature Canon’s latest sub-wavelength structure coating (SWC) for the minimization of flare and ghosting, high-precision aspherical front elements to keep distortion to a minimum and multiple UD elements to reduce chromatic aberration. When used on the 35mm full-frame format, the TS-E 17mm f/4L offers the widest angle of view of any similar lens currently available.” LINK HERE
Now on to the Tech Sheet on The Tilt Shift Lens.
One of the specialty lenses that I have used a lot is the Tilt and Shift lens. I had a 35mmPC for my Nikonsand it was one of my most used lenses. I still like that lens and will shoot it on occasion when film is appropriate.
That lens only had shift, but this new Canon one we got from www.borrowlenses.com, has both shift and tilt. For those who wonder, yes you can also use the shift on a horizontal axis as well as using the tilt as a swing. These are tools of the view camera now on our smaller cameras.
Shifting the Lens
The shift function of the lens is one that I use a lot. Keeping the vertical items from keystoning
(seeming to fall back) can be very useful when shooting architecture, still life and landscape.
On the shot below, I stood in the same spot and made the two images. To get rid of the parking lot, I simply shifted the lens up, keeping the camera vertical without tilting it up. This gave me more dramatic sky without changing the verticals of the architecture in the foreground.
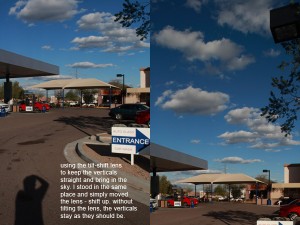
Tilting the camera is what causes the image to seem to fall back. So by keeping the camera at the same vertical axis as the subject, the look of falling back is eliminated.
Here are two diagrams to show how the camera angle can effect the falling away of the subject.
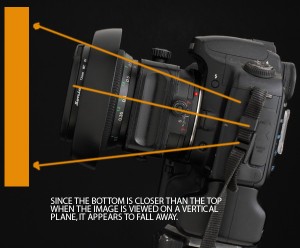
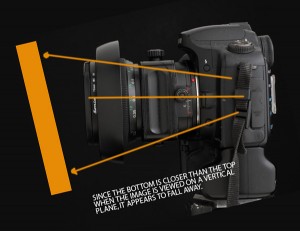
Download the Tech Sheet for a more detailed Tutorial.

In the studio, the Tilt Shift lens can be extremely valuable too.
Here are a couple of shots to show how the lens can be used to increase the field of focus, and also create a more narrow field of focus.
First let’s look at the shot before we do any tilting and shifting to it:
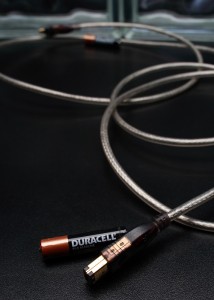
The shots below illustrate the use of the tilt/shift on the above shot:
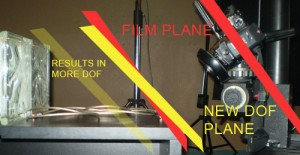
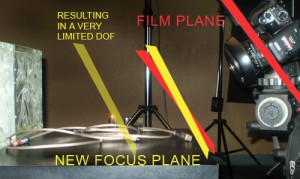
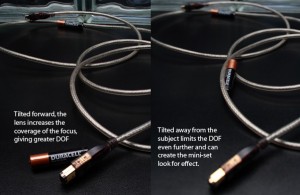
Here is how we can use the shift tool for the studio as well.
As a former studio generalist, I did a lot of shots like this for a wide variety of clients. Many times I liked to use the design of the object itself as a feature of the photograph.
There were many times when doing that and showing the surface that it is sitting on would conflict. I would use a view camera in most cases, either 4×5 or 8×10.
These cameras have tilt and shift on both front and back of the camera. It was absolutely important to be able to compose the image with a sense of design, and eliminate some of the things that were not relevant to the shot.
In this photograph I used the shift function to place the camera at a center spot on the table, eliminating the view of the surface, then shifted the lens to get the composition to the point I wanted it.
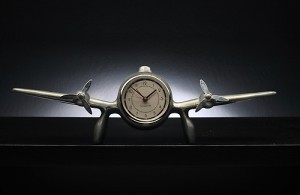
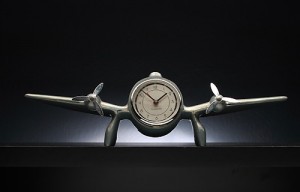
The above image is fine of the clock, but centered the image in the camera gave me too much surface and lessens the dynamic design that could be found in the shape of the plane. Below I moved the camera down to center the surface, thereby nearly eliminating the surface at all, but, now we are looking up at the plane a bit, and there is too much bottom to the picture.
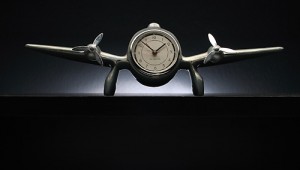
By shifting the lens up, I was able to keep the angle of the camera straight across the table, but center the image of the plane in the frame.
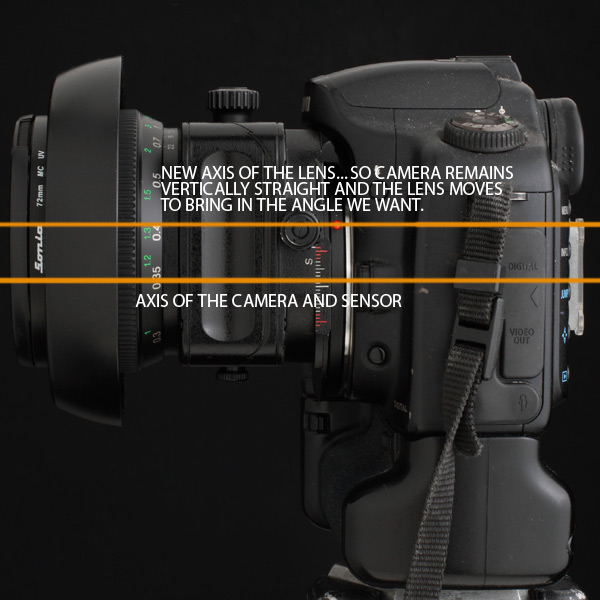
Here was the way we used the camera lens to get the plane into the middle of the frame:
Download the Tech Sheet for a more detailed Tutorial.
Stay tuned and remember to check out the workshop pages, and our site at Learn to Light for more information and all kinds of stuff. BTW, my blog at It’s What I Do is getting a lot of posts these days. From Photoshop links to interesting design tips, you may enjoy it for a more immediate set of posts.
See you next time.
Special thanks to www.borrowlenses.com for the use of this Canon lens. I hope I can find it to send it back, Max… hmmm… now where did I put it? 😉


Awesome writeup Don! I see what you mean about it being like the front adjustments of a rail system.
Gah… stop making me want to buy more stuff…
Great write up Don! I was glad that we were able to provide the lens for you and that you put it to good use.
The part about you not finding the lens was not really funny however 🙂
Max
http://www.BorrowLenses.com
A T/S lens has been on my wish list for sometime…if only my wife could pick those damn lotto numbers. I just wanted to mention the other nice advantage is a two or three frame panorama without parallax error.
Thanks again for all your work Don, you are an inspiration.
I loved it. I have been thinking about getting one for a while and you just sold me.
Great piece Don, I think we will be seeing a lot of T/S photography in the near future, in fact we are seeing a lot of it right now in some of the most impressive images in print and online. I look for it in all the images I review. These lenses are great for landscapes, which I love, and it’s basic gear for that application, also all kinds of still shooting, food and product. For those photographers who have used a view camera this process is nothing new but it is really great to be able to do this with a DSLR, it’s much easier to lug around.
I had 2 recent experiences with T&S lens in the past 30 days.
One was a Canon 45MM and this week a 24mm.
I spent a weekend with the 45 and 1 week with the 24mm.
So far, my experiences were more frustrating than sucessful. I think I need a lot more time to really understand how to operate it properly and get the right results. Last night I tried to correct perspective in several architecture shots and I got pretty bad results.
I wish there was a book or a DVD with a step-by-step guide on how to use it.
It is on my wish list though.
Not sure why it is not working for you, Marcos.
Are you working on a tripod?
Keeping the camera level (not tilting at all)
Shifting the lens up should result in no angle changes and verticals remaining vertical.
Send me a few images that didn’t work and I will see what you possibly did wrong.
A tutorial on the T/S could be a good idea.
— don