“Kill the Lights! Don’t be scared, make a move, see me now”
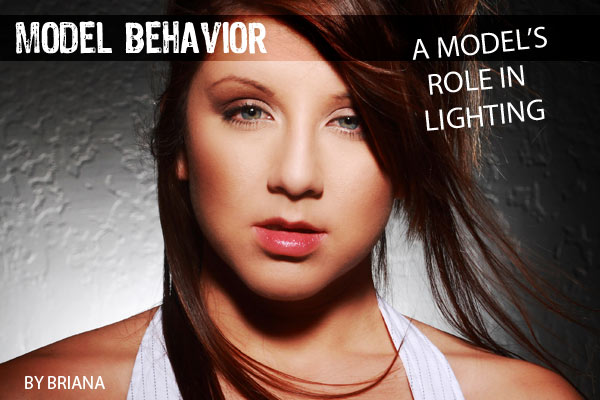
A model has a role in lighting?
What?
Unheard of?
Crazy?
Not so much. A model has to do more than smile prettily and pose, she has to be aware of her environment, from the objects in place to the light of the day (or those man-made suns, Stobes!) But it’s more than simply turning your face to or from the sun to get the photog’s desired outcome. It’s more than inspiration, performance, and range. It’s about awareness; awareness in the structure of lighting and how to get the best out of a shoot. It’s also about knowing how to handle the light and the photogs that use it. The following is a quick outline of the basics and a model’s response to the lighting so that she can generate the most positive outcome she can from the experience. (Note: This article is not about how to light, it’s about how models can use the light that photogs already have set up and how photogs can best explain to models what the photographer wants from the shot.)
(Editor’s Note: A Model’s Role in Lighting? I thought they were supposed to help carry the stuff. Now all the models are gonna read this and no one will ever help me carry the gear again. Sheesh.) Anyway, make sure you visit the tech sheets to get caught up there and remember that the workshops for 2009 are now posted… at least the first half of the year.
Well on with this fantastic article by Briana.
Main Light Awareness:
Main light? What is it? And why should a model care? There’s the sun and then there’s strobes (which, for this article, can include light boxes and umbrellas.) There are also both at the same time. That’s about it. The sun or strobe is the main light and the model should always face the light and then adjust to the photog’s wishes. Sound simple. It is and it’s not. For instance, remember Poltergeist?
“Don’t go into the light, Carol Anne.”
Wrong. “GO to the Light, Carol Anne!” That’s right, look to the light. It’s the sun, the center of a model’s universe. Don’t fear it. Kill it! (Sorry, Britney, I’m adapting your quote to work for me.) That doesn’t mean look into the light, it means pose to the light.
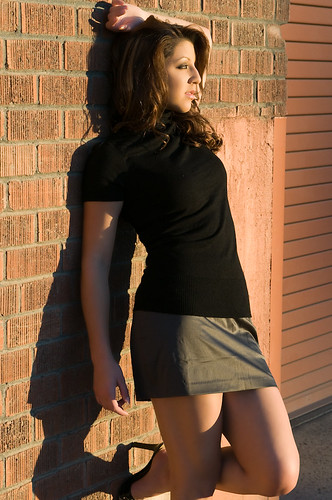
Looking into the sun late in the day.
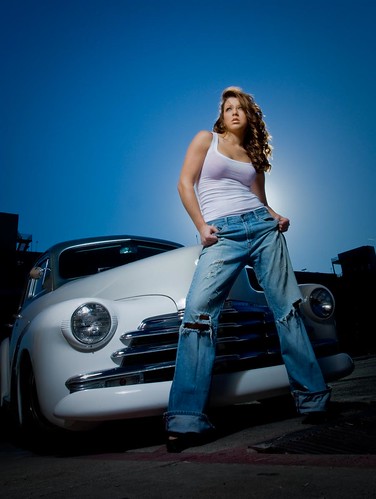
Watching and knowing what a beauty dish does keeps you turned into the light.
A model should center first on the light. Think of that as 1st Position. Now, as discussed in prior articles, a model now uses her range and performance to create art. But that range and performance has its limits. This brings us to 2nd Position, Light Awareness. The choices a model makes when performing must act in accordance to the light. For instance, ducking down, under the light (which the photog spent hours setting up to get the best shots) would be bad. Keep your performance in the light. The spotlight shines on you, so make sure you’re always its central focus.

The sun was nearly on the horizon so I thought of it as a beauty dish.
Mainly, just keep in the light. Shadows are the yin and the yang, the dark and the light, they can equally create havoc as they can contrast with the light and form emphasis. For instance, some pictures of me used shadows to emphasize my nose, or lip, or chin. I liked them a lot. Whereas there are other shots that create features I don’t have and are less than flattering. Not my cup of tea (heh heh.) Yet, it is a photog’s responsibility to direct the model outside the light if that photog so desires. So models just need to continue in 2nd Position (moving with the light) until the photog directs otherwise. It’s simply because, like the yin/yang symbol, shadow/light can equal creation. So 3rd Position is ‘Roll with it.’
Light Changes Constantly – The Sunlight Challenge
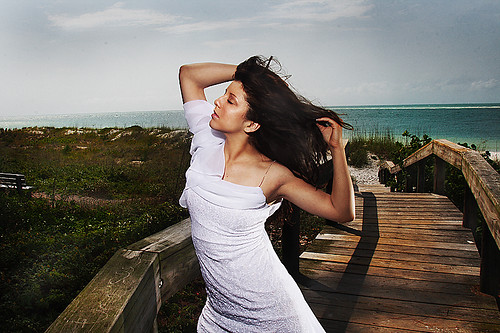
Knowing that the photographer wants the light to be at a specific angle to you helps your posing ideas as well.
Light changes constantly – So must you. Not the whole Darwinian adaptation thing, but in changing positions to follow the light. Mainly this is important when using the sun as the main light, for in the studios an assistant will follow you. But in the sun, follow it. For instance, during one workshop in Tucson we were shooting on a street using the setting sun. But the challenge was we had to keep moving in order to keep the sunlight as the main light so every participant could get the same shot.

The sun was going down behind me, so we kept moving forward to pick it up for backlight. I was always watching where my shadow fell so I could be in the light for the photographers.
Now we all know that not all pictures are taken directly under the sun. In fact, many good ones are taken using the sun, but as filtered by other objects. For instance, a tree’s leaves create both dappled effects and larger spots of light from that which leaks through to the ground. Now a model under a tree must make sure to step into the spot with the most light. This is for shots where hair is important. It’s obviously not going to affect the model’s face, unless, of course, she looks up into the light – which can generate a nice effect as well. (But I must stop there, because that enters more of the complexities surrounding the photog’s job, and I’m here for the model :p). Now why would you want your hair highlighted? Maybe you don’t. But it does give a cool halo effect and therefore knowing what it can do will help you add to your repertoire.
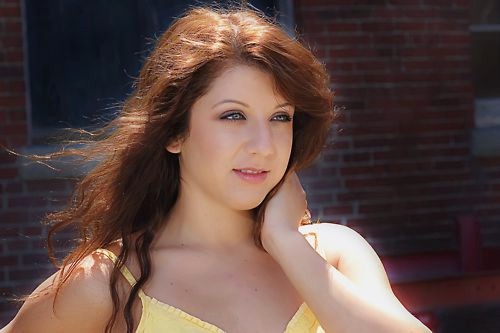
Here the photographer used the sun for my hair and a reflector for the light in front.
Another trick I’ve learned is how to stare into sun. Sort of. The trick is to pick your time. During that magic hour as the light is fading, many photogs like to get a picture of the model’s face (it makes the eyes pop and adds a pretty color to the skin.) The light is perfect. But we models have to stand there staring into the sun and not blink or get watery eyes. My trick is to stare into the distance, facing the sun, but all while looking into a dark area, shadow, or whatever. It helps. Honest.

Here I look into the rising sun.

And here I am intently gazing toward a setting sun.
Secondary Light:
Nothing really to worry about here for the model, the secondary-lighting assistants adjust to the model’s moves. Yes, that’s if there are assistants. If there are no assistants it just means more work for the photog. But occasionally the model might need to hold a reflector to help. Yes, occasionally. But the photog will move the reflector – the model just has to pose like she’s posing for headshots. (3rd Position!)
When the Light’s not Right:
When the light is bad, just get in 1st Position and face whatever light is available. Now it may not equal the best shots, and a model’s portfolio may not expand, but the model’s a pro and should just do her best to get the best out of the moment. It’s professionalism. There are tricks of course, but here’s where it gets awkward. Most of these tricks rely on the photog making adjustments and the model is rarely in a position to tell a photog (the director) what to do. Simple tricks without the photog entail make-up adjustments (use lighter eye shadow colors to reflect what light there is), pulling the hair back to lesson shadows (or pin prior to shooting), and tilting your head to catch what light there is.

Keeping my head up lessened the shadows under my chin.

Talk about knowing where the light is… LOL. The photographers let me see what they were doing on the camera. The light I am “holding” as actually on the stairs behind me.
Handling the Photographer:
As I just wrote, the photog most likely needs to adjust to the conditions, but may not know how. A good model should know as much about the craft as she can and thus can offer advice. (Rule of thumb: Never open your mouth if you don’t know what you’re talking about.) But when you do offer advice, what photog can get over his or her learned assumptions and listen to the talent? The good, the bad, and the ugly can. Photogs will quickly get over assumptions that models are just floating heads with bodies. They’re pros too. But that doesn’t mean the photog will enjoy being lectured by the model. Mainly, it’s appropriate to discuss lighting with a photog when you’re already in a strong working relationship. Otherwise, you may just create animosity.

I worked with the light to make sure my face was well lit.
Yet, sometimes a photog needs to be shown the light, to understand its importance. And thus there are a few sneaky ways to help a photog capture the best shots (or see the light.) For instance, if you understand lighting, don’t look at the photog, look where they should be shooting from. They’ll move to that angle soon enough. And the end results will reinforce the -ahem – lesson. Another way is to just tell the photog you like a certain spot or suggest something that you saw in a magazine and wouldn’t mind trying out (I’m always trying out shots, right, Don? Haha – teasing.)

We tried shooting with me upside down. It worked pretty well, but Don got pretty confused. That happens a lot.
Conclusion: So, models – Britney had it right. Kill the light. It’s nothing to fear. Now move and the camera will see you now.





Thank you for the insight!
Really great article. I wish more models would understand “find the light” . This will be a very helpfull aricle to all aspiring models…….
Wow!! Thanks!! geez… I had no intent on “learning” today… and yet, guess what? heh heh… well written too. Doesn’t come off as pretentious or know-it-all-ish. You had me when you mentioned different lighting accenting different features and I went “OH!! *That’s* why she looks so different in this shot as opposed to this shot etc.” (cheekbones… when yours are brought way out… it makes you look WAY different!) This article rocked. I’m just a normal guy with a 2-year-old shutterbug but… this makes me want to do more. :o) thanks again!
Amazingly useful article, thanks!