Fill flash is a wonderful tool for opening up shadows and creating some light where the situations call for it. In using fill flash we many times refer to ‘Ratios.’ The ratio refers to the amount of light that we add to the ambient. If you think of them as f-stops it may be helpful.
For instance, if you have an ambient exposure of f-8 and you add light at f-11 you have added twice the amount of light. 2:1. If you add light that is f-8 would be a ratio of 1:1. Adding a fill that meters at f5.6, then it is is 1:2, in other words, there would be twice as much sun as there is fill light.
In the images we are looking at today, there are two ratios at work. Both are fine and have their own look. That is a decision that is made by you, the photographer, and you will see both of these used with various types of imagery. For the example, I am using two shots I did back to back in the same wardrobe in the same place. I rarely ever use 2:1 as I don’t really like the dark faces it produces.
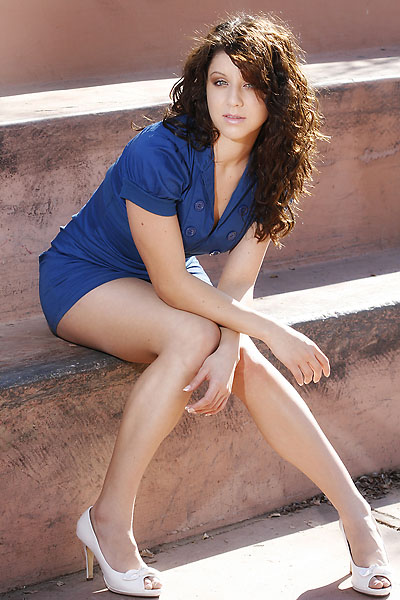
Below left you see a 1:1 ratio that is metered with the sun at f-8 and the flash providing f-8 for the fill. Sun: f-8 at 1/125 coming through the trees. (The direct late day sun would have metered one stop higher, but we are working with the dappled light here.) I placed the flash (a 430EZ) at 1/8 power with a tiny bit of diffusion over the flash head. You can see the shadow line very well. It may not be a problem if it is what you want, and many times it can be used as a design element. The exposure through the dappled is very nice and blends well with the flash lit areas. Note the blend of rim light and flash light on the dress, hair and knee. Background is slightly blown out, but still contains some texture.
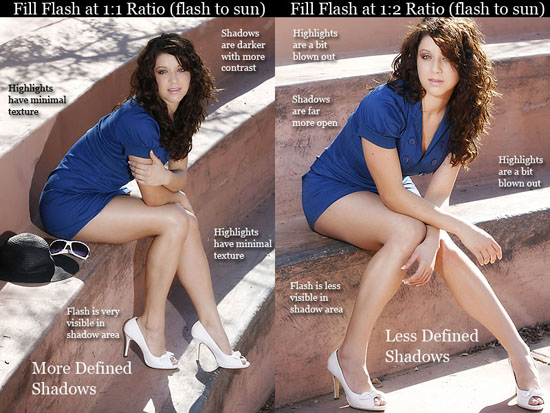
On the right side image we see a ratio of 1:2. That means I added flash that is half the amount of the sun. Sun is still metering f-8 at 1/125 and the flash exposure is f5.6 at 1/125. I set the camera to shoot the f5.6 and thereby over expose the ambient (f-8). This does a couple of things to the image. Shadows are not as defined as the ambient has moved up, the highlights are much brighter, and te sunlit stairs are blown out. I have also gained a stop less Depth-of-Field and I like that personally.
I did not move the flash, instead I turned it down to 1/16 from the previous 1/8. I do move around a bit. And when I do, I am very cognizant about the shadow line that is being thrown by the angle of the flash. I can see the shadow growing across the face as I move away from the flash and create more of an oblique angle. So I like to keep the flash at the angle to the subject creating the smoothest lighting.
Try setting a subject in an area with the sun coming backlit. Meter the backlight and set that as your first exposure. Then move the flash to a point where it matches the backlight. If you get f-11 at 1/125, then set the flash to f-11 and shoot*. Let’s say that means your flash is at 1/4 power at a distance that provides the f-11. Be aware that the different angles you shoot at will provide different shadows and angles of light. If you move too much to the side, bring your flash over a bit with you. Find the angle that you like and try to maintain it as you shoot… be aware of the changes as you shoot.
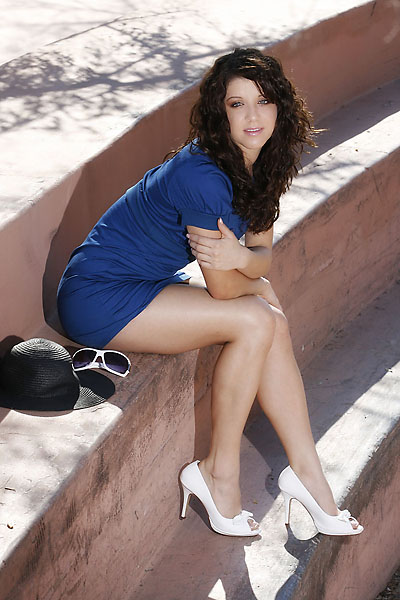
Now change the flash power to one setting lower and open the f-stop to one over the ambient. If you had, as above, f-11, then change your flash setting one step to f-8 and set the camera aperture to f-8. (If you had the flash power at 1/4 and it was f-11, then change it to 1/8 to get f-5.6). Do not change the shutter speed. You are now shooting f-8 at 1/125 which overexposes the ambient light one stop. The flash is providing a correct exposure on the models face. (Please keep in mind that I chose these numbers for comparison, your situation may be totally different.) The backlight is now a whole stop brighter than when you were shooting the previous setup.However, the flash light on the subject has not changed significantly and is nearly identical to the previous shot. This is how you can control the quality of your fill-flash images to be as ‘soft’ a fill as you want.

Keeping careful records of distances and results can go a long way toward making sure that get the image you see in your head. I suggest a little journal for making entries in and viewing when processing the images.
* NOTE: I am referring to shooting in manual here. Position of the light is what determines the exposure. Move it in and out to get the exposure you need. This is not a CLS or ETTL method, it is a manual exposure and manual tools tutorial.



If I may ask, where did you have the flash positioned?
Hi,
Flash on shot left is on a stand to the right of camera about 2 feet and about 6 feet from Briana. Shot on the right has the stand mounted flash in the same spot, I have moved over to the right so that it is now on camera left about 2 feet. I am shooting with a long lens, so the light is very much closer to her than I am.
Thanks for visiting.
Hey I wrote a whole paragraph of information, but for some reason your site reloaded itself and I lost it. Well I was just saying how I tried to use program mode with flash with some unsatisfying results. From now on I shoot manual if I go flash. Thanks for the article
Very sorry about the site. And, yeah… program mode is not the best way to have the most control.
You might want to take a look at http://kaylaandrewsphotography.blogspot.com/2010/11/fill-flash-what-is-it.html – your fotos being used.
Thanks. Appreciated.