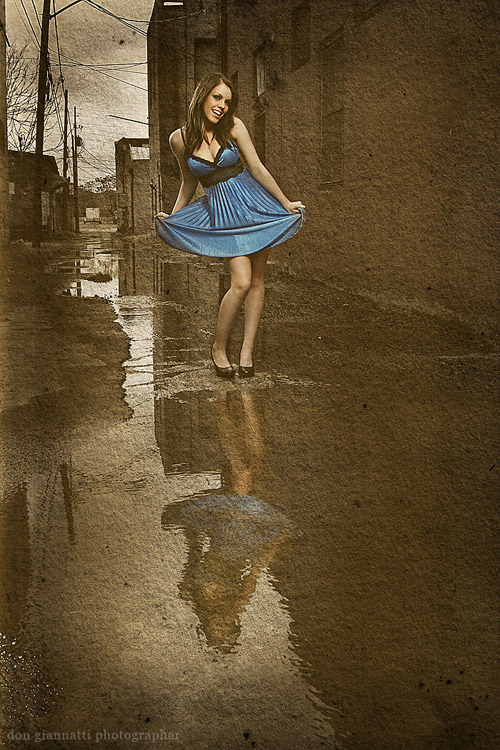
Sometimes you find a location or a situation that you just know that you can do more with by creating the world the way you want it. In this case, the alley was ok, but it didn’t get me excited. I saw the shot in my mind with the post process in place. In other words, the initial photograph was to be used as the material for a Photoshop piece. So with the final image fixed in my head I started to create the image.
First up was the wardrobe. The striking blue dress was a must, but I wanted to keep the color of the rest of the shot muted. To do that I knew I would have to make her stand out a bit more than just flash or bounced light. I needed a separation light… one that seemed to be out of place with the surroundings, and yet subtle enough that it didn’t jump off the page screaming ‘effect’.
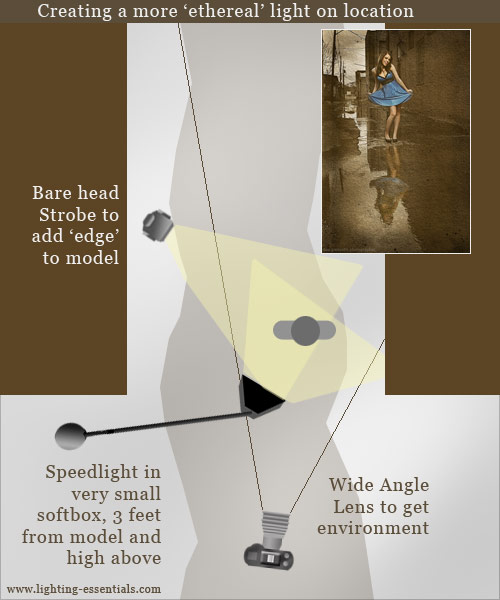
Somer was in the shade, and there was a little fill wrapping around from the front, but not enough to make a difference. This meant I would have to provide the light for Somer. For the main light I used a small softbox on a boom that was held just above her and aimed just a little down. I knew that would give a nice, soft light and a dramatic drop off as the light traveled down her body. This would help give the shot some dynamics and not let it look contrived or ‘pasted in’.
To create the some separation, and add a bit of drama, I placed a strobe with a bare head to the rear of the model and pointed back toward her to create a side/back light. I dialed the power down to make sure the exposure would only be a wink compared to the main light. Since it was coming from the back, it would catch the edge of her arms and legs and actually appear brighter.
The other thing that was essential was the reflection of Somer in the water in front. It was a subtle thing and yet it seemed so powerful as a compositional element. I knew the light on Somer would make her bright enough to be seen in the reflection.
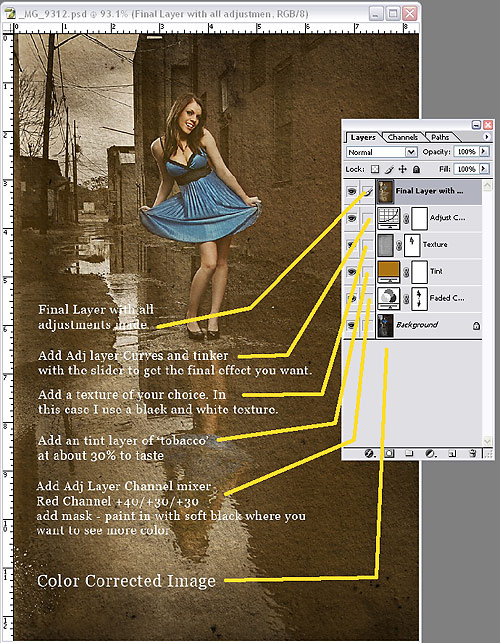
In Photoshop I used some high band filters to give it an ‘edgy look’ then masked out the background and muted it. I added some noise and a texture to give it character. There are lots of actions that can be used, and you can use them instead of doing the manual work, but it is rather easy, if you take your time and build it in one layer at a time.

In the above example, the color correction and highpass work has been done and moved to a flattened base layer. You can prepare that image to your own taste. Included in the screenshot are the Photoshop layers and how/why they were chosen.
|
Information for today’s photographer. From novice to pro, LEMagazine has it all. |
 |
 |


Great post Don. A really great image and how-to that works. Always look forward to more.
Don, where can I get a softbox for my 580EX II?