Well we are back from the Cleveland workshop and it was amazing. Bright sun and clear skies were a super benefit… for someone somewhere… we had rain, wind, snow, rain, wind and cold. At least for Bri and I coming from the desert… We left Cleveland at about 28 degrees and landed at Sky Harbor at about 78. And that was at night.
I wanted to get a post done over the weekend, but dang… those Clevelanders (and Illinois, Indiana, Connecticut and Georgia) folks know how to have a workshop. It was amazing. We rolled with the inclement weather and did about a gazillion setups. No complaining… just rolled up sleeves and shooting shooting shooting.
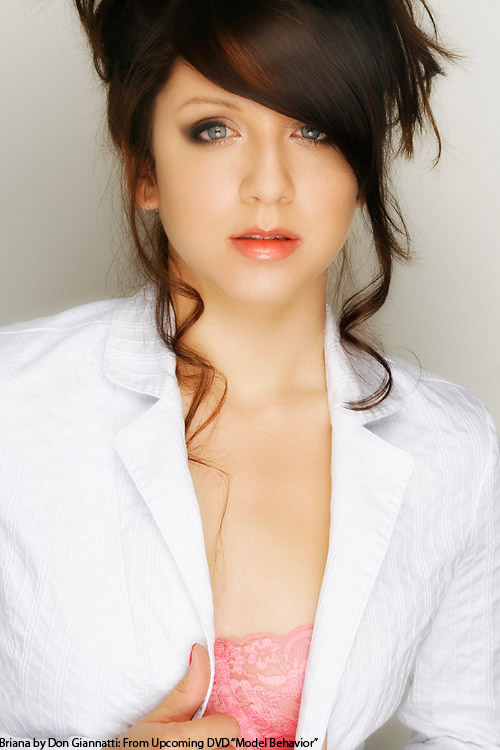
Anyway, there was a discussion recently about clamshell lighting and I thought of this earlier shot I did of Briana with a simple clamshell setup. So I thought it may be nice to include it here while I put the finishing touches on this weeks Tech Sheet.
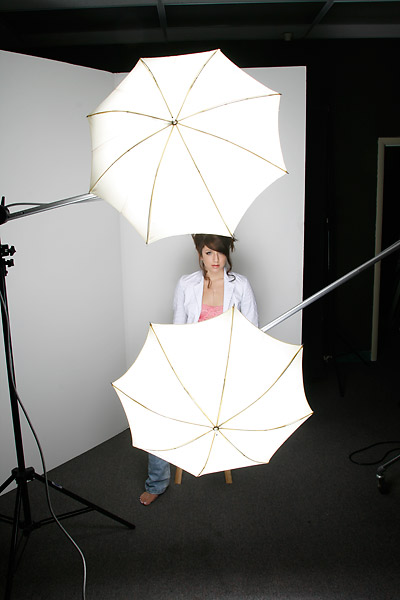
Clamshell lighting is sometimes described as a light source and a fill card, but I have always thought of it as two umbrellas, usually matching, right on the vertical axis of the camera with one over the lens and one under the lens. I have used this from very close to medium distance and love the results.
Cool thing is you can do this same lighting with small strobes as well as studio guns. With small strobes you have the added benefit (to me anyway) of powering them down and getting a very large aperture for limited DOF.
Let’s take a look at how this lighting works:
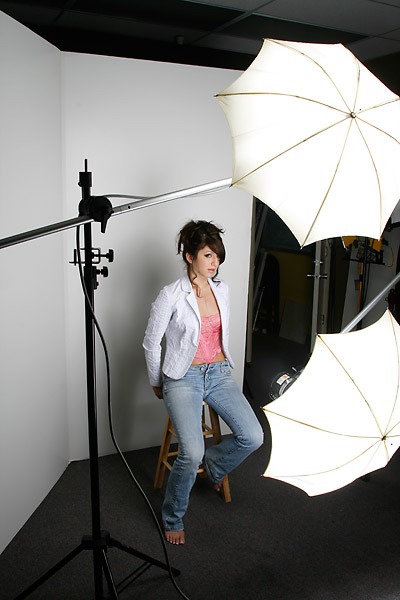
As you can see in the image, I have placed Bri right next to the background. In this case it is a piece of the V-Card… fome core actually. The background gives a great specular edge (since Bri’s head is hiding most of the specular) and a wonderful little shadow all around her. Somewhat like a ring light would do. This is because the lights are so close to the lens that it has much of the characteristics of a ring flash.
Here are is the setup shot showing how the umbrellas are placed from camera:
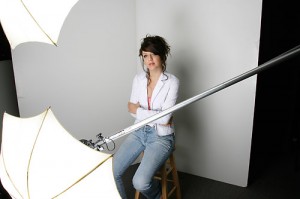
This shot shows the distance of the umbrellas from Bri as we do the shots:
I like using matching umbrellas for a lot of reasons… power is the same, faster setup and the matched catch-lights all make it worth getting two of the umbrellas that you plan on using. I could use larger ones, but I think that the smaller work better for me to get in close. I love the drop off of close lighting and the effect that it has on the skin.
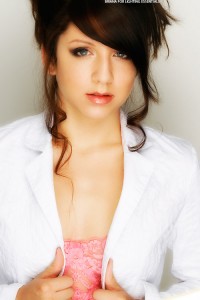
You can see how soft the shadow is behind her even though there is little fill added on either side. You can add all the fill you want, it is ‘flavor to taste’ and I chose to leave it out for a more striking frontal light. This shadow just peeks around the subject and adds a bit of gradient to the image that helps the subject stand off the background even while being right next to it.
Another shot of Briana with the Clamshell Lighting:
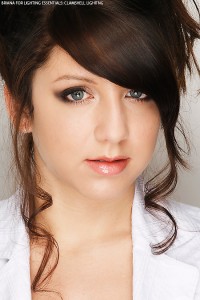
I also like the way the white pops off the background because of the slight shadow caused by the clamshell.
Assignment to try:
1. Try your clamshell with shoot through umbrellas as well. While I am not a fan of them, they can be somewhat different in the effect they give and can become another tool for your shots. Bring your lights in as close as you can and see what effect they have then shoot the same thing with the bounce umbrella.
2. Add a fill card on both sides of your model… in close, right out of camera. Take a few shots and move them away 6 inches at a time.
3. Try using speedlights at 1/16 or even 1/32 power with shoot throughs and in very tight to try to get f-2.8 or 4 and drop the depth of field to as little as possible. Keep focus on the eyes.
Thanks for dropping by. New tech sheet coming this Friday. Watch the site for some announcements on next years workshops. They are being totally redesigned and will be better than ever. We do want to have the best workshop anyone has ever attended.




this is the best website for photographers period! You guys go through details, lighting ratio’s, f/stops shutterspeeds, photoshop techniques. Just wanted to say Thank you!!
Another great replay of the clamshell lighting, I want to try this again. i just found this new tech sheet place. Go DON ! will try to catch up on the LE Flickr site.
Up to now, I’ve been using clamshell lighting with a shoot through umbrella and a shiny reflector for fill. I thought that by shooting through, the light would have been softer compared to light reflected off the umbrella. Thanks for sharing your approach to this setup – I’ll definitely try it out. 😀
Great site! I am new to strobes at my home getto studio and I must say this sit rocks. I’ve learnt so much now have to practise a lot. Thank you so much!
Great site! I I’ve learnt so much now have to practise a lot. Thank you so much!
Hi..This is really very imformative..Thank you so much!
My daughter is learning about Photography and she would benefit from this website so much. I want to say a big thank you for all of your help that you have provided, it’s all been informative and interesting.